Wednesday, 9 November 2022
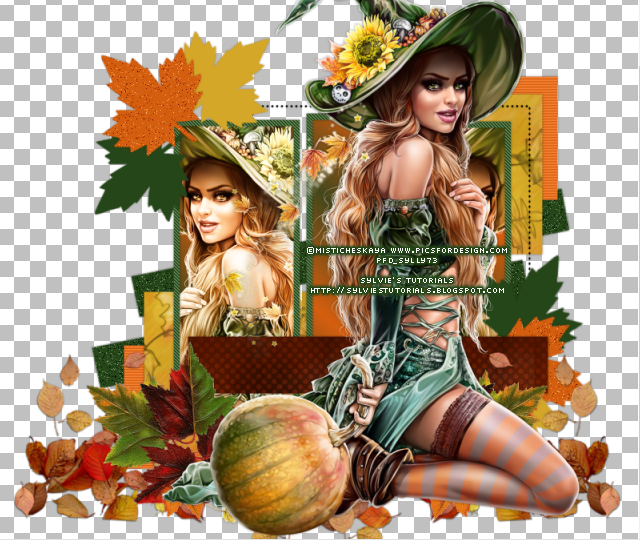
AUTUMN SPLENDOR

SUPPLIES NEEDED
Tube - ©Misticheskaya - at PicsForDesign.com - HERE
Scrap Kit - FTU - Autumn Splendor by My Tagging Addiction - HERE
Template - by Melissa, on Creative Misfits Blog - HERE
(I used template 01)
Fonts Used:
Adova Zombia & Pussycat - for the Wordart
& Advantage - for the name
Mask - Vix - Mask 229 - HERE
Plugins Used:
penta.com - Jeans & VTR2
~~~~~~~~~~~~~~~~~~~~~~~~~~~~~~~~~
Okay, let's get started!
1.
Open the template in PSP.
Shift + D and then close the original template.
Image - Canvas Size - 800 x 800
Paste your tube on your canvas.
If using the same one as me, I resized by 35%.
Add a dropshadow, 0, 0, 40, 4.00.
Grab 'leaf scatter 2' from the kit. Paste it to the right of the canvas at the bottom.
Duplicate it, and Image - Mirror.
I moved both underneath the tube layer.
Open 'leaves 3' from the kit and resize by 50%.
I pasted it over top of the leaf scatter - add a dropshadow.
I used 0, 0, 30, 3.00
Duplicate it - Image - Mirror
2.
Time to make a gradient.
Super easy, no worries.
Pick two different colors from the tube you are using.
I chose #d65e0f & #44471b
Once they are in the material palette, click the center of one of the colors
And it should be a gradient with the two colors in your material palette.
Use these settings:

3.
I hide all original layers after I'm done with them,
so there is no outline with these next steps.
Click on the large orange rectangles layer
Selections - Select All
Selections - Float
Selections - Defloat
Add a new raster layer and floodfill with the gradient we just made.
Selections - None
Now paste your tube over top of the gradient layer we just made
Place it exactly where you want it.
Duplicate it - Image - Mirror so they're on each side
Duplicate each again, and change the blend modes
Bottom: Luminance (Legacy) and Top: Screen
I trimmed the tubes so they weren't showing in the middle rectangle.
4.
Click on the black frame around the rectangles we just added a gradient to, so it's active.
Selections - Select All
Selections - Float
Selections - Defloat
Add a new raster layer and floodfill with a darker color from your tube.
I chose #254618
Selections - None
Effects - Plugins - penta.com - Jeans - default settings
Add a dropshadow, I used 0, 0, 40, 4.00
5.
Open paper1 from the kit, and resize by 77%
Click on the 2 darker grey rectangles that come from each corner of the rectangles we just worked with.
Paste the paper over top of them.
Click on the grey rectangles to make them active again.
Selections - Select All
Selections - Float
Selections - Defloat
Selections - Invert
Click on the paper layer again and hit the delete key.
Add a dropshadow to them.
Repeat these same steps to add paper 4 to the long dark grey rectangle near the bottom of the template.
6.
Click on the layer with two diagonal rectangles (very bottom layer on template)
Selections - Select All
Selections - Float
Selections - Defloat
Add a new raster layer and floodfill with the same dark green we added for the frame.
Selections - None
Adjust - Add/Remove Noise - Add Noise
Random - 18% - Monochrome: checked
Add a dropshadow now.
Click on the two black rectangles layer.
I added the color #d35e0f
Effects - Plugins - Penta.com - VTR2 - default settings
Add a dropshadow to them, same as before.
Lastly, the leaf layers.
I used the dark green and yellow for the black leaves and orange for the grey.
I also added some noise to the orange ones, same method as above except the percentage is 8.
This is what I have now:
Now just to add last bits.
I added a dropshadow of 0, 0, 30, 3.00 to each of these.
See my tag for reference or add it where you'd like it!
Leaves 3 - resize by 40% this time
branch 2 - no resizing needed
leaves 1 - resize by 60%
cluster 5 - resize by 70%
corn - resize by 40%
tree - no resizing needed
Now, using the fonts above (or fonts of your own)
Type the words AUTUMN and Splendor
I used Pussycat size 65 for AUTUMN and Adova Zombia size 48 for Splendor.
Now add the mask, using the dark green .
Add your sparkles, copyright and name.
We are all finished!
Thank you so much for following along!
♥
© sylvie's tutorials.
Written November 9, 2022.
CENTERFOLD

Tube - ©Arthur Crowe - No longer for sale - Store is closed
But any tube will do if you don't have this one!
Scrap Kit - FTU Centerfold by Tamie & Vicki - Download HERE
Preset Shape Tool - Rectangle
~~~~~~~~~~~~~~~~~~~~~~~~~~~~~~~~~~~~~~~~~~~~~~~~
1.
File - New Image - 750 x 750 - transparent.
Paste your tube to the canvas.
If using the same one, I resized by 65%.
Open 'filmstrip 3' from Tamie's part of the kit, resize by 85%
Image - Rotate - Free Rotate by 90% to the left.
Place it to the right of your canvas and underneath the tube.
Now open 'filmstrip' from the kit, no resize necessary.
Right click your layer - Arrange - Send to Bottom
Move it so it comes up over top of the tube
Open 'drape' from the scrap kit and resize by 85%
I sent this to the very bottom now and coming up from behind the frame we just pasted on.
You should now have this:

Click on the filmstrip layer coming up over her head to make it active.
Using your magic wand tool, hold down your shift key and click in each small square
Selections - Modify - Expand by 2
Selections - None
Adjust - Add/Remove Noise - Add Noise
Random - 28% - monochrome: checked
Now click on the frame layer again to make it active
Using the magic wand once again, click inside the frame
Hold down the shift key to click in the second one too
Make sure both of the pink floodfilled layers are beneath the frame layer.
Add a dropshadow to the frame.
I used 0, 0, 40, 4.00.
Add a part of the tube you would like over the pink floodfilled layer.
Trim any excess and then duplicate the tube.
Change the blend mode to Luminance (Legacy) for the bottom one
3.
Paste the part of the tube you want to use over the filmstrip 3 frame.
Move it so it's exactly where you want it.
Click on that frame to make it active now.
Using your magic wand tool, click on the center 3 squares.
(holding down the shift key again)
Selections - Invert
Now click on the tube layer so it's active and hit the delete key.
Selections - None.
Adjust - Hue & Saturation - Colorize
Duplicate the tube layer
Change the blend mode to Luminance (Legacy) on the bottom
And change the blend mode to Overlay on the top.
Add a dropshadow to the frame layer now, same as before.
Using your preset shape tool, draw a pink rectangle
and place it right behind the frame.
(this way it hides all of the bits from the other frame and the drapes)
Effects - Texture Effects - Blinds

4.
Now in Vicki's part of the kit, grab 'ele2' which is the polaroid.
Resize by 60%.
And to the left of the tag.
Using your magic wand tool, use the same steps as above
And then changing the hue & saturation & changing the blend modes.
Also add a dropshadow, same as before.
Using Vicki's 'ele19' frame, i placed it to the right coming out from behind tag.
Added a tube, and used all the same steps again.
Open 'p2' (paper 2) from Tamie's portion of the kit
and the frame we just added
Add a dropshadow, same as before.
Now, Open 'pp4' from Vicki's portion of the kit
Add a dropshadow to this one too.
This is what you should have now:

5.
From Vicki's part of the kit
'Ele40' I placed these flowers in various places around the tag.
Ele20 - resize by 35%
Ele22 - resize by 25%
Ele25 - resize by 30%
Ele23 - no resizing necessary
From Tamie's part of the kit
lips - resize by 50%
StrobeUmbrella - resize by 60%
star - resize by 70%
Now add your mask of choice
(I used a Becky mask from back in the day, no longer available for DL)
Add your copyright, and tag is finished!
Thank you so much for following along!
♥
© sylvie's tutorials.
Written November 9, 2022.

Tube - ©Fiodorova Maria - VM Artists - HERE
Scrap Kit - Doodles by Design - Unwrap the Fun - HERE
Gradient - Tonya Temptations - I used XmasGrad_Reindeer - HERE
Plugins Used:
penta.com - Jeans & Color Dot
Xero - Radiance
Preset Shapes: rectangle & circle
Mask: by Narah (1056) - I can't find a site with her masks
Unsure that I can share it, so I won't - but any mask will do in the meantime.
~~~~~~~~~~~~~~~~~~~~~~~~~~~~~~~~~~~~~~~~~~~~~~~~
1.
File - New Image - 800 x 800 - transparent
Grab 'frame 2' from the scrap kit - resize by 75%
Paste it to the left of the tube
Duplicate it
Image - Rotate - Free Rotate to the right by 15%
Floodfill them with a color from your tube or the kit
I chose #108e3f
Add a dropshadow to both of your frames.
I used 0, 0, 40, 4.00.
Paste a part of your tube over top of your floodfilled layer for the top frame.
Trim any excess off.
Image - Mirror and place it exactly where you want it.
Duplicate the tube
Change the blend mode of the bottom tube to Luminance (Legacy)
And change the blend mode to the top tube to Hard Light
Hide all layers except the top green floodfilled layer and the tubes over it.
Layers - Merge - Merge Visible
Duplicate this merged layer
Effects - Plugins - penta.com - Jeans - default settings
Lower the opacity of the top one to 40
Duplicate the layer that you lowered the opacity on
Effects - Plugins - Xero - Radiance - default settings
And lower the opacity of this layer a smidgeon more down to 26.

2.
Add dropshadow to each of these as you go, I used 0, 0, 30, 3.00.
Now, grab the element 76 from the scrap kit, resize it by 85%
Paste it to the right of your tube, coming out from behind it
Element 39 - resize by 30% - Image - Mirror - place over the tree but under main tube.
Element 36 & 32 - Resize by 30% and place to the left of the main tube
Open up 'frame7', and before posting to your canvas, duplicate it
Change the blend mode to Overlay
Now copy and paste it to your canvas, resize by 85%
Image - Free Rotate - Rotate by 90% to the right
Move this frame to the left of the tag, coming up from your previous frames.
Using your magic wand tool, click in each of the squares of the frame
while holding down your shift key so it will select them all
Add a new raster layer - floodfill it with your gradient
Lower this layer beneath the frame
Selections - None
Now add whichever part of the tube you want to use, and trim excess.
Duplicate the tubes
Change the blend modes : Luminance (Legacy) on the bottom, Soft Light on the top.
Add a dropshadow to frame, I used 0, 0, 40, 4.00.
Once again, add dropshadow as you go. I used 0, 0, 30, 3.00 again.
And look at my tag for reference on placement of elements, or go on your own!
♥
Element 3 - resize by 15%
Element 14 - resize by 40%
Element 17 - resize by 15%
Element 29 - resize by 30%
Element 30 - resize by 40%
Element 50 - resize by 40%
Element 56 - resize by 60%
Element 64 - resize by 40%
Element 100 - resize by 40%
Element 108 - resize by 40%
Element 126 - resize by 25% ( i used this twice!)
4.
Now using the same gradient you used before
Use your preset shape tool and draw a circle
Convert to a raster layer and lower it to the very bottom layer.
(I have it coming out from the top right of the tag)
Selections - Select All
Selections - Float
Selections - Defloat
Selections - Modify - Expand by 8
Add a new raster layer and lower it beneath the gradient circle
Floodfill with the color red I used #db1a25
Selections - Modify - Expand by 3
Add a new raster layer again and lower it beneath the red layer
Floodfill with your gradient once again
Selections - None
Click on your very bottom gradient layer to make it active
Adjust - Add/Remove Noise - Add Noise
Random - 42% - Monochrome: checked
Add a dropshadow, 0, 0, 40, 4.00
Now click on the red circle layer to make it active
Effects - Plugins - penta.com - Color Dot - default settings
Now, grab a part of your main tube and paste it over top of your top gradient circle.
Trim excess and duplicate the tube
Bottom change the blend mode to Luminance (Legacy) and top one to Overlay
I also added another bit of my tube at the top of the circle and lowered the layer beneath the other two
And changed the blend mode to Luminance (Legacy) and lowered the opacity to 24%.
Add sparkles of choice, your mask and your copyright.
We are now finished our tag!
Thank you so much for following along.
♥
© sylvie's tutorials.
Written November 9, 2022.
Wednesday, 2 November 2022
WINTER GREETINGS

Tube - ©Nocturne - at PicsForDesign - HERE
Preset Shape Tool - Rectangle
Plugins
penta.com - Jeans
DSB Flux - Linear Transmission
My Supplies - (snowflakes, snow, winter tree) - HERE
Some of the doodles are from Lori, blo (doodles from my noodle) blog HERE
~~~~~~~~~~~~~~~~~~~~~~~~~~~~~~~~~~~~~~~~~~~~~~~~
Okay, let's get started!
1.
File - New - New Image - 750 x 750
Using your rectangle shape tool, draw a rectangle to the left of your canvas.
Vertical and Horizontal Radius set to 0.00
Convert to a raster layer.
Click on the 'Raster Deform Tool' and change the mode to 'perspective'
Leave all other settings at default.
Using your mouse, click on the nodule that is far right, and pull it down
See pix below:


Layers - Merge - Merge Visible.
You should now have something that looks like this.

2.
Paste the tube you want to use in the center of the card.
Choose two colors from your tube to make a gradient with.
I used #8ba3aa and #d7b3ba
Once you have two chosen colors in your material palette, click on the center of one of the colors.
Choose the gradient tab at the top, and choose 'foreground-background' in the options in the dropdown.
Angle: 42
Repeats: 4
Invert: unchecked

Click on the card template to make it active
Selections - Select All
Selections - Float
Selections - Defloat
Add a new raster layer & floodfill with your gradient you made
Selections - Modify Expand by 7
Add a new raster layer and lower it beneath the gradient layer we just made
Floodfill with a color from your tube, I used #5f747a
Add a new raster layer and lower it beneath the blue layer
Floodfill with the gradient one more time.
Selections - None.
3.
Click on the blue layer
Effects - Plugin Effects - penta.com - Jeans - default settings
Add a dropshadow - I used 0, 0, 40, 4.00
Click on the lowest gradient layer to make it active
Adjust - Add/Remove Noise - Add Noise
Random - 30% - Monochrome: checked
Add a dropshadow, same as before.
You should now have something like this:

4.
Paste your tube over each side of the card where you would like it to be placed.
(see my tag at the top for reference)
Now, grab the 'winter tree' from my supplies, as well as the falling snow
I pasted the tree on each side of the card over top of the tube
Click on your card template layer
Selections - Float
Selections - Defloat
Selections - Invert
Click on your tube layers and hit the delete key
Click on the tree layers and hit the delete key
Selections - None
Change the blend mode of the tubes to Luminance (Legacy)
And lower the opacity to 50%
Now duplicate them and change the blend modes to Opacity.
Now change the snow layers blend mode to SoftLight
Duplicate them and then lower the opacity to 22%
Click on the main gradient layer and add a dropshadow , same as before.
Add the same dropshadow to the main tube layer.
5.
Paste the snow (SR_Long Ice Icicles & Snow) to each side of the card over top of all of the layers
Now grab one of Lori's snowflakes (ColorfulSnowflakes) and paste to either side of the card.
Then grab a smaller version of the snowflake (same file) to add to the top on each side
Grab my wordart from the supplies, or make one of your own
Paste it to the top of the card.
Using the color #4aa3d9, draw a rectangle slightly bigger than the card on each side.
Objects - Align - Center in Canvas
Convert this layer to a raster layer and lower it to the very bottom layer.
Adjust - Blue - Gaussian Blur - 25.00
Make sure it doesn't go beyond the size of your canvas, if it does use less blur
or make a smaller rectangle.
Effects - Plugins - DSB Flux - Linear Transmission
Use the following settings

Now, do the same at the top of the tag
Duplicate it, and Image - Flip so it's at the bottom too.
Now open 'snowflakesbyLoriBluesPurples' from the supplies.
Use some of the snowflake doodles on each side of the tag and up at the top.
Lower the opacity to 70.
I changed mine to white but you can use as is too.
♥
Thank you so much for following along my tutorial!
Written November 2, 2022.
Tuesday, 18 October 2022
Witches Brew

SUPPLIES NEEDED
Tube - ©Verymany - Witch_19 - HERE
Scrap Kit - Manipulated by Magik - PTU - Witches Brew - HERE
Plugins: penta.com - Jeans
Preset Shape Tool - Rectangle
Masks: My mask at sylly creationz - Mask 038 - HERE
Also PSP Masks by the Asylum - Heidi Vargas HERE
I used 1119 - HERE and 1305 HERE
Autumn Leaves - at Clean Png - HERE
Fonts Used: Impact, Scary Halloween, Adova Zombia (the name)
If you don't have or can't find Impact font, I've typed the word BOO out for you using it.
Just click on the image to make it full size, then right click and save

~~~~~~~~~~~~~~~~~~~~~~~~~~~~~~~~~~
Okay, let's get started!
1.
File - New - New Image - 800 x 800 - transparent
Paste the tube you are using onto the canvas. Move it far left.
If the same as mine, I resized by 50%.
Using the Impact font, size 250 and color #fb7a06, type the word BOO
Convert to a raster layer.
Selections - Select All
Selections - Float
Selections - Defloat
Selections - Modify - Expand by 5
Add a new raster layer
Floodfill with black and lower it beneath the BOO layer
Now add another new raster layer and keep it above the black layer
On your material palette, click the middle button under the color orange called 'texture'

Click on the center of the color now and choose 'Grid' in the dropdown to the right
Angle: 0 Scale: 48

Floodfill the new raster layer with this texture
Selections - Modify - Expand by 3
Floodfill it with the orange again and lower it beneath the black layer
Selections - None.
Make the orange bottom layer active
Adjust - Add/Remove Noise - Add Noise
Random - 42% - Monochrome: checked
Add a dropshadow of choice to your black letter layer and the noisy letter layer.
(Trim any excess from the tube to ensure your tube is fitting on your canvas, so there is no overlap)
Click on the original BOO layer to make it active
Selections - Select All
Selections - Float
Selections - Defloat
Selections - Invert
Click on the tube layer and hit the delete key.
Selections - None
Duplicate the tube layer now
Bottom layer change the blend mode to Luminance (Legacy)
Top layer change the blend mode to Overlay
Hide your main tube layer to the left
Layers - Merge - Merge Visible
Now unhide your main tube layer again.
You should now have the tube, and the merged Boo layers.
Now we can move on.
3.
Paste to your canvas and lower to the very bottom layer.
Move it over so it's coming out from beneath the BOO.
Add a dropshadow.
Here is what I have so far:

Now, using your Preset Shape Tool - set to Rectangle
Horizontal Radius: 20 and Vertical Radius: 20
Draw a rectangle to the left of the tube, and then another to the right coming out from under the paper.
To the left one, we're going to add our tube again, using same steps as above.
I also added the black textured layer and noisy layer - again same steps as above around the rectangle
To the right one, apply Penta.com - Jeans - default settings.
See my tag for reference
Add a dropshadow to all rectangular bits.
4.
Elements to add to the tag that I have added:
(You can go on your own and add what you'd like, of course!)
I added a mild dropshadow to each bit also
Please check my tag for reference to placement, if following along!
Element 57 - resize by 40%
Element 9 - no resize necessary
Element 83 - resize by 40%
Element 79 - resize by 50%
Element 93 - resize by 40%
Element 74 - resize by 40%
Element 70 - I separated them and then resized by 80 and 70%
Element 18 - resize by 65%
Element 113 - resize by 40%
Element 97 - resize by 10%
5.
Using the rectangle preset shape tool again
I used the orange again and drew a rectangle coming out from the top of the tag
Lower this layer to the very bottom
Add a dropshadow
Using the font 'Scary Halloween', type the word WITCHY
Add a dropshadow.
Add sparkles of choice
Apply your masks
I used the spiderweb mask to come out from each part of the tag
and then the other masks beneath that.
Now, save this pixel text and apply it in various places around your tag just above the masks.
I lowered the opacity to 55%
Lastly, I added the .png autumn leaves at the bottom of the tag, linked above
I resized by 5% , look at my tag for reference
Once pasted where I want it, I duplicated it
Change the blend mode of the top layer to Overlay and lower the opacity to 54%
Add your copyright and save!
♥
Thank you so much for following along my tutorial!
Happy Halloween guys!
Written October 18, 2022.
Saturday, 17 September 2022
HAUNTED GARDEN

Tube - ©Enys Guerrero 55-2 - available at CDO - HERE
Scrap Kit - Haunted Garden by Tamie at Addictive Pleasures - HERE
Mask - by me - Mask027 - on my blog sylly creationz - HERE
Fonts Used: Vanilla Mermaid
My supplies - HERE
Okay, let's get started!
New Image - 800 x 800 - transparent
Ele 2 - paste to your canvas
Add a dropshadow 0, 0, 30, 3.00
Paste Ele 3 over top of 2 and again add a dropshadow.
Lower down so about an inch of the first element is showing up top.
Now open 'frame' from the kit, and paste it to canvas and move it where you'd like it.
(no dropshadow to it just yet)
Ele 1 - resize by 60% - and place it at the bottom of the tag to the left.
Add a dropshadow to it.
Open 'cross' from the kit and resize it by 85%.
Move it to the right side of the tag, at the bottom.
Ele 12 - resize by 85% and move it to the bottom of the tag and move it as left as you can get it.
Right click - Arrange - Send to Bottom
Add a dropshadow
Duplicate it - Image - Mirror
You should now have this

2.
Ele 13 - resize 85% - I put this layer right above the frame layer.
Now, using your freehand selection tool - draw around the bits of paper you want to delete
Selections - None
Now open 'vine' from the kit, resize by 70%
Move it to the very right of the tag and lower the layer to the very bottom
I made it come out from beneath the tag.
Duplicate - Image - Mirror
Now duplicate again
Image - Rotate - Free Rotate by 90% to the left
Move it to the top of the tag, furthest left
Duplicate - Image - Mirror
You should now have something that looks like this

3.
Paste your tube to the canvas, I resized by 60%.
I lowered the layer just below the cross layer, and over the frame layer.
'Ivy2' from the kit, resize by 70%. Paste over the bottom of the tube.
Now duplicate the tube - Image - Mirror
Move it to the left of the frame and lower beneath the frame layer.
Trim excess off the tube, and then change the blend mode to Screen
Lower the opacity to 58%.
I pasted this just below the tube, over the ivy.
'Flower' - resize by 50% - put it to the left top corner of the frame.
4.
Open 'weeds' from my supplies.
I put one coming from behind the log and the other coming behind the cross.
Now grab the transparent flowers from my supplies and resize by 35% and paste it in front of the log
I duplicated it and brought one out from behind the cross too.
Grab the 'roses' from the supplies now
Image - Grey Scale
Now paste to canvas and lower beneath the transparent flowers and log.
Now grab my mask, and I used it with both colors: black and #534d45.
Add your copyright, sparkles of choice and tag is finished!
Thank you so much for trying my tutorial.
© sylvie's tutorials.
Written September 17, 2022.
Friday, 16 September 2022
FIGHTER

Scrap Kit - Pink for Hope - Manipulated by Magik - on her blog HERE
Template - by me - Template 053 - Slab - sylly creationz - on my blog HERE
Mask - Mask0139 by SophisticatSimone - HERE
Preset Shape Tool: rectangle
Fonts Used: Fixed_01 (pixel) and
My Supplies (texture by Suz, with permission & my wordarts) - HERE
Note:
Okay, let's get started
1.
Open the template
Shift + D to duplicate it
Close off the original
Open 'frame 2' from the kit and paste it anywhere on the canvas for now.
Open the tube of choice and place it where you want it.
Add a dropshadow to it.
(I used 0, 0, 30, 3.00)
Now, from my supplies open up the BCA texture from Suz
Resize it by 77%
Add it to your material palette
Click on the pink slabs layer to make it active
Selections - Float
Selections - Defloat
Floodfill it with the texture in the material palette
Selections - Modify - Expand by 5
Add a new raster layer and lower it beneath the floodfilled one
Once again floodfill this one with the same texture we just used
Selections - None
Adjust - Add/Remove Noise - Add Noise
Random - 41 - Monochrome: unchecked
2.
Now, using your tube, duplicate it a few times and move them over the pink floodfilled layer.
Once placed where you want them, click on the floodfilled layer to make it active
Selections - Select All
Selections - Float
Selections - Defloat
Selections - Invert
Now click one of the tube layers and hit the delete key to remove excess.
Selections - None
Duplicate the tube layers.
Bottom one change the blend mode to Screen
Top one change the blend mode to Overlay
Now click on the texture layer and add a dropshadow.
3.
Click on the 'pink noisy back' texture
Add a new raster layer and using the same method as above, floodfill it with the texture again.
Add a dropshadow.
Using the same process, floodfill the 'black dotted back' layer with the color #f05ecc.
(I did not add a dropshadow to this layer)
Lastly, click on the 'black slabs' layer and floodfill it with the same color again.
Now, duplicate your tube 4 times and move them in place over the 2 left and 2 right slabs
I hid all layers except the 4 tube layers and clicked on one of the tube layers to make it active
Layers - Merge - Merge Visible
Now unhide the layers
Change the blend mode of the bottom one to Luminance (Legacy)
Change the blend mode of the top one to Soft Light
Now, duplicate the Soft Light layer and change the blend mode to Screen
Click on the pink floodfilled slab layers and add a dropshadow
Here is what you should have so far.

4.
Click on 'pink noisy rectangle' layer and using method above, floodfill with texture.
Add noise again
(same settings as above)
Effects - Plugins - Penta.com - Color Dot - default settings
(I did not add dropshadow to this layer)
Now, click on 'pink rectangle' layer and floodfill it with the texture.
Add a dropshadow.
Now click on the frame layer we grabbed from the scrap kit
(but over top of the slab layers)
Using your magic wand tool, click inside of the frame
Selections - Modify - Expand by 8
Add a new raster layer and lower it beneath the frame layer
Add a dropshadow to the frame.
Now, add a part of your tube to each side, trim excess.
Duplicate them and change the blend modes
Bottom : Luminance (Legacy)
Top: Screen
5.
Grab the wordarts I made now and add them.
Wordart 01 I put over the rectangle layer under the tube
Now using the pixel font, type the words 'Breast Cancer Awareness' using the color white
Image - Rotate - Free Rotate - Left by 90%
Place it on the left of the frame we added from the kit
Duplicate it - Image - Mirror
Then move it down to the right side of the frame
Image - Rotate - Free Rotate - Right by 3%
Adjust - Sharpness - Sharpen
Look at my tag for reference on the placement of each of these elements.
(I added a dropshadow, same as above on each.)
Grab the 'pink ribbon 2' from kit - resize by 40%
'Cherries' - resize by 35%
'Heart' - resize by 35%
'Perfume bottle' - resize it by 40%
'Polish' and resize it by 25%
'Star Rainbow' - resize by 80%
'Butterfly' - resize it at 40%.
'Sparkles'
I placed the sparkles underneath the main tube and Star Rainbow layers
And going across the slabs
Duplicate
Right click the layer and Arrange - Bring to Top
Lower it beneath the main tube layer and lay the sparkles across the wordarts near bottom of tag
6.
Add paper 11 into your material palette
Using your preset shape tool
Horizontal and Vertical Radius set to 0
Draw a rectangle on the left side and lower the layer to the very bottom.
Add dropshadow.
Duplicate - Image - Mirror
Now draw a rectangle at the top of the tag as well as the bottom.
Add dropshadow to each.
I lowered the opacity of the mask to 68
Now, using the pixel font, type the words FIGHTER over the top of the top rectangle.
Now add your copyright
and this tag is now all finished!
Thank you so much for following along with me.
Written September 16, 2022.
Wednesday, 14 September 2022
Happy Halloween

Tube - Ismael Rac - 2013 Pumpkin Carver - No longer for sale, but any tube will do
Template 052 - Simple Halloween - by me - sylly creationz - Download HERE
Gradients of choice - i used a number of gradients from Tonya's Temptations - Blog HERE
(i used HalloBoo & Autumness - miss you so much Tonya)
♥
Autumn Pattern Background - at Clean Png - HERE
Autumn Leaves - at Clean Png - HERE
Mask - Fall Mask 8 by Dangerously Delicious Designs - HERE
Fonts Used - Mussica Swash (for the name)
My Supplies - HERE
(please let me know if you get your downloads back up Lori, and i'll gladly link you!)
1.
Open the template, Shift + D to duplicate it, and close off the original.
Paste the tube you are using onto the canvas, I resized the tube by 50%.
Grab your gradient of choice and put it in your material palette
Selections - Float
Selections - Defloat
Add a new raster layer
Floodfill with the gradient
Duplicate your tube and move it over top of the rectangle where you want it
Lower the layer right above the rectangles
Selections - Invert
Click on the tube layer and hit the delete key
Selections - None
Add a dropshadow to the gradient rectangles layer
(I used 0, 0, 40, 4.00)
Click on the 'text: pixel' layer and change the blend mode to 'Screen'
2.
Make the 'black square' layer active
Selections - Float
Selections - Defloat
Add a new raster layer
Floodfill with the color #fb7700
Use the plugin Penta.Com - Jeans (default settings)
Add a dropshadow, same as above.
Now, make the '2 small rectangles' layer active.
Selections - Select All
Selections - Float
Selections - Defloat
Add a new raster layer
Floodfill with the color #fb7700 again
And now use the plugin Xero - Fritillary - settings below

3.
Make the '4 orange squares' layer active.
Adjust - Add/Remove Noise - Add Noise
settings below

Click on the 'text: HALLOWEEN' layer
Go back to Add Noise again, except lower the noise to 14.
Click Ok.
Now, click on the 'text: HAPPY' layer and do the same thing
Click on both of the text: White Back layers and add a dropshadow.
Now, use the plugin Eye Candy 4000 - Gradient Glow
Glow Width: 3.00
Now click on the 'color' tab
Choose 'thin' and add the color black
Do this to both text: white back layers
Click on the '4 black squares' layer now
Add a dropshadow and Effects - Texture Effects - Blinds

4.
Make your '4 squares' layer active now.
Paste a closeup of your tube over the layer and place it where you want.
I placed one over each square.
Selections - Select All
Selections - Float
Selections - Defloat
Selections - Invert
Click on the tubes layers and hit the delete key with each one.
Hide all layers and then merge your tube layers together.
Layers - Merge - Merge Visible
Selections - None
Duplicate your tubes layer
Change the blend mode of the bottom one to Luminance (Legacy)
Change the blend mode of the top one to Soft Light
Add a dropshadow.
Now unhide the rest of your layers again.
5.
Open the 'Autumn Pattern Background' downloaded from Clean Png.
Resize by 17%.
Add a dropshadow of 0, 0, 30, 3.00
Add it to the right hand top corner coming out from behind all layers.
Duplicate - Image - Mirror
Duplicate - Image - Flip
Duplicate - Image - Mirror
Open 'Autumn Leaves' now and resize by 3%
I cut each individually, and then pasted one of each various places on the tag
Lastly, grab the file in my supplies.
I used the cat, the hanging spider and the bat.
Now add your mask, sparkles of choice, copyright and save.
♥
Avatar that I made to go with the tag to make a 2 piece set.

Written September 14, 2022.
Tuesday, 6 September 2022
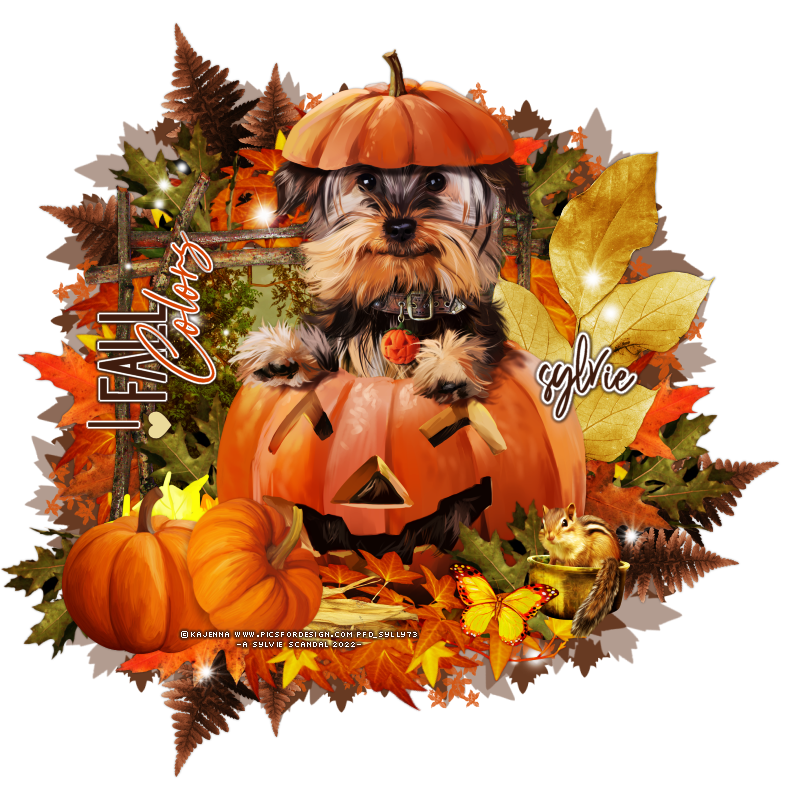
Tube - Autumn by Kajenna - HERE
Kit - Fall Colors - FTU by Scrappy Bit of Fun - HERE
Plugins: Mura's Meister - Copies & Penta.com - Jeans
Mask - by me - sylly creationz - grab the mask at Creative Misfits blog - HERE
Gradient - I used one by Tonya's Temptations, but made for Misfits, not on her blog
(any gradient will do, however)
Fonts Used -
♥
~~~~~~~~~~~~~~~~~~~~~~~~~~~~~~~~~~~~~~
Okay, let's get started!
1.
New Image - 750 x 750 - transparent
Open frame 8 and paste it to your canvas.
Element 45 - resize by 70%
Effects - Plugins - Mura's Meister
Move this layer beneath the frame.
Element 27 - resize by 70%
I placed it four places around the frame, removing excess not needed.
Element 2 - resize by 50%
Paste it to the left of the frame at bottom.
2.
Element 29 - resize by 50%.
Move it to the right side, over top of the leaves we just added.
I duplicated it and placed it in 3 more places too.
I did the same, placed it in four different places around the frame.
This is what I have now.

3.
Paste your tube onto the canvas, I resized by 30%.
I put it right beneath my tube, coming out from behind the 2 pumpkins to the left.
Element 30 - Resize by 30% and put to the right of your tube.
Element 60 - resize by 40%
I put it over to the left of the chipmunk.
Frame 7 - no resizing needed
Right click the layer
Arrange - Send to Bottom
Move it so it's coming out from the left side and bottom
Duplicate - Image - Mirror
Image - Flip
It should be coming out from behind right side and top now.
Element 37 - resize by 35%
I made it come out from behind the two pumpkins at the bottom of the tag.
4.
Paper 15 - resize by 60%
Paste to canvas right beneath your main frame layer.
Move it to where you want it exactly.
Using your magic wand tool, click inside of the main frame
Selections - Modify - Expand by 8
Selections - Invert
Click on the paper layer and hit the delete key.
Selections - None
Add sparkles of choice
I put mine beneath the main tube layer.
Now, add the mask , the copyright and name
We are all finished now, YAY!
Thank you for trying my tutorial!
♥
© sylvie's tutorials.
Written September 6, 2022.
Tuesday, 30 August 2022
MEOW

Tube - ©Verymany - You can find it HERE
Wordart - MEOW - on my blog sylly creationz - HERE
Gradient - TBT_Bluebells - Tonya's Temptations - HERE
Mask - SophisticatSimone Mask 96 - HERE
Fonts Used - Bank Gothic for Here Kitty Kitty text and Lalisa for the name
Dog & Cat Paws - HERE
Plugins - Xero - Fritillary
My Supplies (frame, roses & narah mask) - HERE
(mask by Narah included, if anyone knows of a link for her masks now
~~~~~~~~~~~~~~~~~~~~~~~~~~~~~~~~~~~~~~~~~~~
Let's get started!
1.
New canvas - 750 x 750 - transparent
Paste the frame from my supplies onto your canvas
Using your magic wand tool, click inside the frame
Selections - Modify - Expand by 6
Add a new raster layer
Move it below the frame layer and floodfill it with your gradient of choice
Selections - Select None.
Add a dropshadow to your frame if you wish.
Now, open the tube you are using, and paste it to your canvas.
Resize as needed.
For this next part, I used a close up version of the tube, but you don't have to.
Grab the closeup version of the tube, and paste it to canvas as well.
Resize as needed. Move it to one side
Duplicate - Image Mirror
Click on the gradient layer to make it active.
Selections - Select All
Selections - Float
Selections - Defloat
Selections - Invert
Click on your tube layers and hit the delete key.
2.
Duplicate the tube layers
Change the blend modes to Luminance (Legacy) on the bottom layer
And Overlay on the top layer.
Hide your main tube layer and the frame layer.
Click on one of the other layers to make it active.
Layers - Merge - Merge Visible
Go to Effects - Texture Effects - Blinds

Now, paste the wordart from my supplies, right above the frame layer.
Move it down so it's right where you want it.
3.
Using the rectangle preset shape tool, draw a rectangle lengthwise using same gradient as before.
Horizontal and Vertical Radius set to 20.00
(this will draw the rectangle with rounded corners)
I lowered it so it comes from behind the frame and the wordart.
Here is what I have so far.

4.
Using the same method as above, add your tubes to this rectangle.
When changing blend modes though, use Screen for the top instead of Overlay.
Now with the color #3b63bb draw another rectangle and make it shorter than the wordart but coming down behind the rectangle we just drew.
Once again, using the method we used above, add your tube.
Add dropshadow to your rectangle layers.
Now, using that same blue, draw a smaller rectangle right over the wordart layer.
Here is what my tag looks like now.

5.
I added the close up tube to the small rectangle, using the same method as above.
Change the blend mode to Screen.
Add a dropshadow to the rectangle layer.
Paste your spike bracelet to your canvas.
Resize by 80%.
Adjust - Sharpness - Sharpen
Add a dropshadow and place it right over the smaller rectangle.
Now, add the roses supplied in my supplies.
Place it at the top of the small rectangle and lower the layer right beneath the spike bracelet.
Add a dropshadow.
Open the Narah mask from my supplies
New Image - 550 x 550
floodfill with the same blue as above
Apply your mask now.
Layers - Merge - Merge Group
Copy and paste it to your tag canvas, and move it to the left of the tag.
Effects - Xero - Fritillary - settings below
Now duplicate it
Image - Mirror
Image - Flip

6.
Using your rectangle preset shape tool again, color: black
Draw a rectangle coming out from the top of the tag now.
I merged them together
(the black rectangle and the tube added)
Adjust - Hue & Saturation - Colorize
Hue: 156
Saturation: 133
Now Duplicate it.
Image - Rotate - Free Rotate by 10% to the right
7.
Using color black and font of choice
(I used Bank Gothic)
Type the words Here Kitty Kitty at the bottom of the tag.
Now add the paw print, resize by 15%.
Selections - Select All
Selections - Float
Selections - Defloat
Selections - Modify - Expand by 2
Add a new raster layer and floodfill with the blue we used earlier.
Selections - None
Move this layer beneath the paw print.
Add noise and a dropshadow. Place it over the wordart.
Add the SophisticatSimone Mask, I used the gradient again for this
And then lowered the opacity to 64.
Using the pixel font 'Fixed_01', I added the words Here Kitty Kitty
And lowered the opacity to 42 and placed them right over the MEOW wordart.
Add your name and your copyright.
Also add sparkles of choice, if you want them.
That is it for this tag!
Thank you for following along
♥
© sylvie's tutorials.
Written August 30, 2022.
Tuesday, 23 August 2022

Tube - from ©Verymany - Steampunk 77 - HERE
Kit - FTU by Mizteeque called All Steamed Up - HERE
Mask - Dangerously Delicious Designs - GeoMask2 - HERE
Preset Shapes - Circle
Plugins - penta.com - Color Dot
My Supplies - (tag bottom) HERE
~~~~~~~~~~~~~~~~~~~~~~~~~~~~~~~~~~~~~~~~~~
Okay, let's get started now!
1.
File - New - New image - 750 x 750 - transparent
Open 'el 34' from the scrap kit and paste it to your canvas
Image - Rotate - Free Rotate by 90% to the left.
Open 'el 33' from then kit, paste it to the canvas and move it below the frame.
Now, open 'paper 17' from the kit.
Resize it by 68% and paste it just beneath the frame but over the rectangle layer.
Using your magic wand tool, click inside of the frame.
Selections - Modify - Expand by 15
Selections - Invert
Now make your paper layer active and hit the delete key.
Now add the round frame 'el 74' and resize it by 50%.
Place it over top of the rectangular layer and under the frame, coming out from the left.
2.
Open your tube of choice, I am using Steampunk_77 by Verymany.
Paste it to your canvas as the very top layer.
Duplicate it, and move this one below the frame layer
Image - Mirror
Move it to the left of the top tube.
Click on the paper layer to make it active.
Selections - Select All
Selections - Float
Selections - Defloat
Selections - Invert
Click on the tube under the frame layer, hit the delete key.
Selections - None.
Duplicate the tube layer under the frame
Now, with the bottom one change the blend mode to Luminance (Legacy)
Do the same with the small round frame, only change the top blend mode to Screen this time.
This is what you should have now.

3.
Elements to Add:
These are all over top of the frame layer mostly..
and at the bottom of the tag
(add a dropshadow to each layer as you go)
el 12 - resize by 25%
el 55 - resize by 30%
el 6 - resize by 60%
(el 6 and el 57 were placed over the tube in center of the tag)
Now, I duplicated el 57 and moved to the right of the tag
lower it over top of the rectangular layer that we have beneath the frame
so it's coming out from the side
el 43 - resize by 50%
el 4 - resize by 25%
el 42 - resize by 50%
And well, any other elements you'd like!
Swap some elements, shake it up and make it your own!
♥
4.
Now, I am working on coming out from behind the tag
Open el 10 and resize it by 60%.
Image - Rotate - Free Rotate by 90% to the right.
Drop this layer to the very bottom and move it coming out from the right side of the tag.
Duplicate the layer
Image - Mirror
Now, I duplicated the gear layers (el 6 and el 57)
Drop them to the bottom layer and bring them out from the top and sides.
el 62 - resize by 40%
5.
Open up el 78
Also open up your paper 17 again that we used earlier
Resize it to 68%.
Now go to your material palette and go to Patterns to find your paper.
Click on el 78 to make it active
Selections - Select All
Selections - Float
Selections - Defloat
Add a new raster layer and floodfill it with the paper.
Hide the original layer and then copy and paste it to the canvas.
Resize it by 50%.
Add it coming out from the top left corner of the tag.
Add a dropshadow.
6.
Now, open up the tag bottom you downloaded in my supplies.
Make this come out from each side of the tag at the bottom.
Now, I used my preset circle shape and added the circles to each side, and one at the top.
I added dropshadow and used penta.com (color dot, original settings) on them.
These are not necessary either, I just used them as a filler and to add some dark color .
Lastly, using any font of choice, add the word STEAMPUNK to the front on the metal piece.
Now add your mask, sparkles of choice and watermark.
We are all finished with this tag!
© sylvie's tutorials.
Written August 23, 2022.
Subscribe to:
Posts
(Atom)


