Showing posts with label valentines. Show all posts
Showing posts with label valentines. Show all posts
Wednesday, 11 January 2023
POLKA VALENTINE

SUPPLIES NEEDED
Tube © Alex Prihodko - VMArtists - HERE
FTU Scrap Kit by SimplyVicki - Smoochie Woochie - HERE
Font Used
Impact - for the wordart
Fixed_01 - for the pixel font
Fanfare - for the name
Mask - #44 by me - sylly creationz - HERE
Okay, let's get started!
1.
Open Element 51 from the kit, resize by 90% and paste to the canvas
Image - Rotate - to the Right by 90%
Make a gradient using two colors from the scrap kit now
I used #db1014 and #fb78ae
Using your Magic Wand Tool, click inside of the frame
You will see marching ants around the frame
Selections - Modify - Expand by 8
Add a new raster layer now and lower it beneath the frame layer
Floodfill with your gradient you made
Selections - Select None.
2.
Open the tube you are using now and paste it to the canvas.
Resize it so it fits within the canvas, move it over the gradient layer to the right of the frame
Now, use a close up and move it to the left and underneath the tube you just pasted on.
Click on the gradient layer
Selections - Select All
Selections - Float
Selections - Defloat
Selections - Invert
Now click on each of the tube layers and hit the delete key.
Click on the closeup, add a dropshadow (0, 0, 30, 3.00) and duplicate it
Change the blend mode of the bottom layer to Luminance (Legacy)
And change the blend mode of the top layer to Screen
Now, click on the other tube to make it active
Add a dropshadow (same as above) and then duplicate it
Change the blend mode of the bottom layer to Luminance (Legacy)
And then change the blend mode of the top layer to Overlay
Add a dropshadow to the frame layer now
Click on the gradient layer again
Effects - Texture Effects - Blinds

3.
Layers - Merge - Merge Visible
All layers should now be merged together
Duplicate your frame
Image - Rotate - Free Rotate by 10% to the right
Lower this layer beneath your main frame layer
This is what I now have:

(I used 0, 0, 40, 4.00)
4.
Now these are the elements I placed on my tag
Use my tag for reference, and add a dropshadow if you like
I used 0, 0, 30, 3.00
Element 35 - no resizing necessary
(Image - Rotate - Free Rotate - by 10% to the left)
Element 71 - resize by 60%
Element 38 - resize by 40%
Element 13 - resize by 35%
Element 53 - resize by 50%
Select the Impact font, or a font of your choice
Size: 125 - Color: #db1014
Convert to a raster layer
Image - Rotate - to the right by 90%
Move it to the right of your tag, like mine
Click on the main tube layer to make it active
Selections - Select None
Edit - Paste
Move it over top of the word XOXO
Now, make the XOXO layer active
Selections - Float
Selections - Defloat
Selections - Invert
Click on the tube layer and hit the delete key on your keyboard
Selections - Invert again
Selections - Modify - Expand by 2
Add a new raster layer and lower it beneath the XOXO layer
Floodfill it with the color #fb78ae
Selections - Select None
Adjust - Add/Remove Noise - Add Noise
Add a dropshadow of 1, 1, 50, 5.00
Now click on the tube layer over the XOXO layer again to make it active
Now click on the XOXO layer
Duplicate it
Effects - Texture Effects - Blinds
(same settings as earlier)
Now lower the opacity of this layer to 62%
Place them over top of the XOXO wordart in various places
Now using your preset shape tool
Draw a heart and add it a few random places
See my tag for reference
Adjust - Add/Remove Noise - Add Noise
Random - 8% - Monochrome: checked
You can also just save and use this heart if you wish
(Just right click and save)

Add your copyright, and tag is finished!
Thank you so much for following along!
♥
© sylvie's tutorials.
Written January 11, 2023.
Tuesday, 4 January 2022
HUGS AND KISSES

Plugins: I used Penta.com - (ColorDot & Jeans), Layout Tools (Contrast Checkers)
& Toadies (What Are You?)
Mask: I used my own mask SC_Mask044, available on my blog HERE
Fonts Used: pixel font Fixed_01 HERE & Artisan Signature - available HERE
Century Gothic (came with my PSP)
Fonts Used: pixel font Fixed_01 HERE & Artisan Signature - available HERE
Century Gothic (came with my PSP)
Rectangle & Heart Preset Shape Tool
My Wordart: Hugs And Kisses Valentine - on my blog HERE
My Supplies (accents) - HERE or HERE
(included are my preset & heart accent)
Not supplied - sparkles (any will do), texture (no longer available for download)
~~~~~~~~~~~~~~~~~~~~~~
My Wordart: Hugs And Kisses Valentine - on my blog HERE
My Supplies (accents) - HERE or HERE
(included are my preset & heart accent)
Not supplied - sparkles (any will do), texture (no longer available for download)
~~~~~~~~~~~~~~~~~~~~~~
Now let's get started!
1.
Grab my selection (syl_selection01) from supplies and add it to your selections folder.
(My selections folder is under My PSP Files under Documents)
(My selections folder is under My PSP Files under Documents)
New image 750x750
Add the tube to your canvas (I used a closeup).
Place to the left of your canvas, and then duplicate it
Image - Mirror.
Layers - Merge - Merge Visible.
Add a new layer to your layer palette and floodfill with a color of choice.
I used #f795da.
2.
Go to Selections
Load Save Selection - Load Selection From Disks
Using the dropdown, choose my selection 'syl_selection01'
Make sure 'Source Luminance', 'Replace Selection' and 'Invert Selection' are the only ones ticked off..
Now click on load.
You will see marching ants around the border of your canvas, as well as the selection I made you.
Click on each layer in your layer palette and hit the delete button.
Place to the left of your canvas, and then duplicate it
Image - Mirror.
Layers - Merge - Merge Visible.
Add a new layer to your layer palette and floodfill with a color of choice.
I used #f795da.
2.
Go to Selections
Load Save Selection - Load Selection From Disks
Using the dropdown, choose my selection 'syl_selection01'
Make sure 'Source Luminance', 'Replace Selection' and 'Invert Selection' are the only ones ticked off..
Now click on load.
You will see marching ants around the border of your canvas, as well as the selection I made you.
Click on each layer in your layer palette and hit the delete button.
Selections - Select None.
Make your color layer active.
Ensure it is still over top of the tubes layer.
Change the blend mode to 'soft light'
Now Layers - Merge - Merge Visible.
3.
Now duplicate your merged layer twice, and hide the two top layers.
Click your unhidden layer to make it active.
Using Toadies - What Are You? X-Dose: 30 and Y-Dose: 30
Click Ok..
Use Layout Tools Plugin, Contrast Checkers - default settings
Make your color layer active.
Ensure it is still over top of the tubes layer.
Change the blend mode to 'soft light'
Now Layers - Merge - Merge Visible.
3.
Now duplicate your merged layer twice, and hide the two top layers.
Click your unhidden layer to make it active.
Using Toadies - What Are You? X-Dose: 30 and Y-Dose: 30
Click Ok..
Use Layout Tools Plugin, Contrast Checkers - default settings
Duplicate this layer.
Image - Rotate - Free Rotate - Left - 25.00
And then duplicate - Image - Mirror.
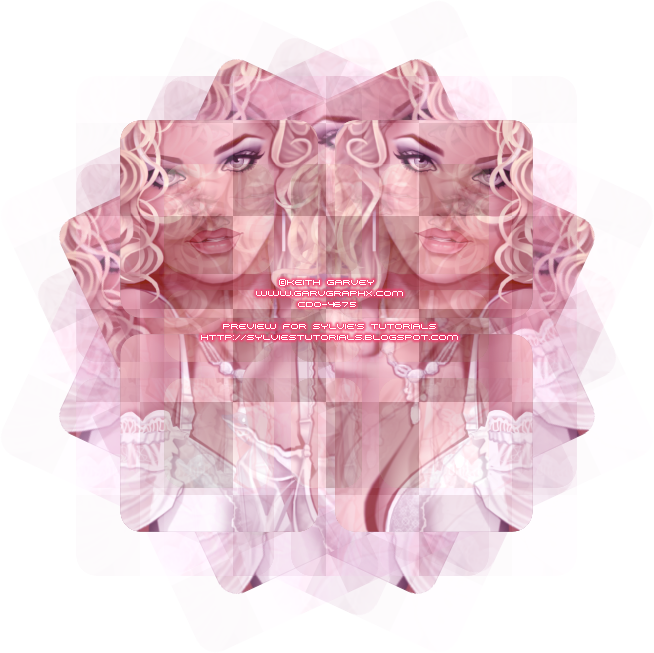
Next, unhide the middle next bottom hidden layer.
Using the penta.com plugin, choose ColorDot - default settings.
Again go to Image - Rotate - Free Rotate by 15.00 to the left
And then duplicate - Image - Mirror.

4.
Unhide your top hidden layer and make it active.
Selections, Select All
Selections, Float
Selections, Defloat
Selections - Modify - Expand by 5.00
Add a new layer and floodfill with the same color you chose earlier.
Lower this layer beneath the top layer.
Using your Penta.com plugin, use Jeans - default settings
Add drop shadow of choice.
And then duplicate - Image - Mirror.
Next, unhide the middle next bottom hidden layer.
Using the penta.com plugin, choose ColorDot - default settings.
Again go to Image - Rotate - Free Rotate by 15.00 to the left
And then duplicate - Image - Mirror.
4.
Unhide your top hidden layer and make it active.
Selections, Select All
Selections, Float
Selections, Defloat
Selections - Modify - Expand by 5.00
Add a new layer and floodfill with the same color you chose earlier.
Lower this layer beneath the top layer.
Using your Penta.com plugin, use Jeans - default settings
Add drop shadow of choice.
Selections - Modify, Expand by 3.00
Once again add a new layer.
Floodfill with a gradient or color of choice.
Lower this one beneath the color Jean layer.
Adjust - Add Noise
Random - 46% - Monochrome: checked
Add drop shadow of choice.
Selections - Select None.
Now click on the top layer to make it active
Duplicate it . Then click on the top one making it active.
Use penta.com - ColorDot on the duplicated layer at the top - default settings again.
Lower the opacity to 30%.
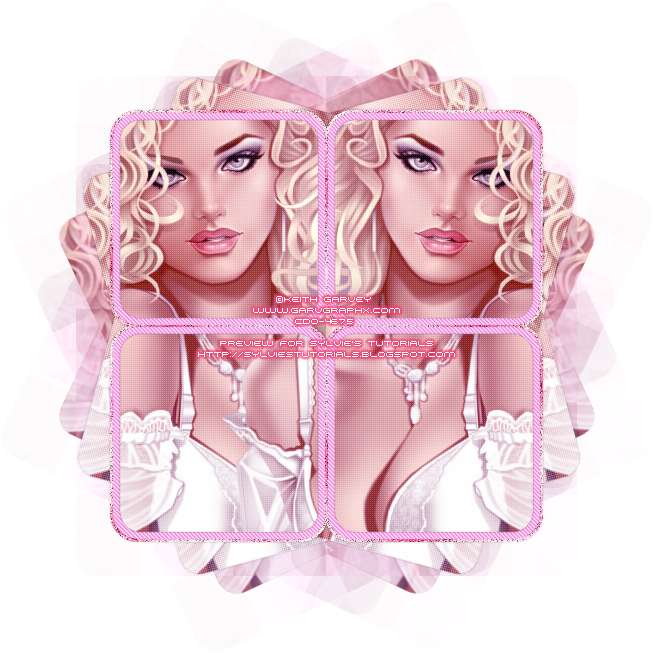
5.
Now, let's add your main tube and place it where you would like it.
Use a sparkle of choice to add it over the tag - lower beneath the tube layer.
Go to the rectangle tool, Horizontal and Vertical Radius set to 20.00,
Once again add a new layer.
Floodfill with a gradient or color of choice.
Lower this one beneath the color Jean layer.
Adjust - Add Noise
Random - 46% - Monochrome: checked
Add drop shadow of choice.
Selections - Select None.
Now click on the top layer to make it active
Duplicate it . Then click on the top one making it active.
Use penta.com - ColorDot on the duplicated layer at the top - default settings again.
Lower the opacity to 30%.
5.
Now, let's add your main tube and place it where you would like it.
Use a sparkle of choice to add it over the tag - lower beneath the tube layer.
Go to the rectangle tool, Horizontal and Vertical Radius set to 20.00,
Line Style: solid, Width: 0.00
Draw a rectangle just below the tube for her to sit on, if you have chosen a tube that is sitting down.
Use the same settings as above in step 4
(Selection - Modify, Jeans Plugin, Adding noise, etc)
This is where I used the texture, for the top rectangular layer.
Use any texture or paper of choice, the one I used is no longer available for download.
Adjust - Hue & Saturation - Colorize - H: 219 S: 198
(if you need to colorize what you use and using the same color scheme)
Use the same settings as above in step 4
(Selection - Modify, Jeans Plugin, Adding noise, etc)
This is where I used the texture, for the top rectangular layer.
Use any texture or paper of choice, the one I used is no longer available for download.
Adjust - Hue & Saturation - Colorize - H: 219 S: 198
(if you need to colorize what you use and using the same color scheme)
Add drop shadow of choice to each layer.
Paste your wordart over top of the rectangle.
Add drop shadow.
6.
(please see my tag for reference on the placements of everything in this step)
Grab your heart accent from my supplies. Paste to each side at the top of the tag.
Using preset shape tool, draw a small heart. Move to one side of the tag.
Duplicate it. Image - Mirror.
Now, draw a bit larger size heart, and move to the top corner of the rectangle.
Duplicate it. Image - Mirror.
Effects - Texture Effects - Blinds -
Width: 2.00, Opacity: 40.00, Color: white, Horizontal: checked
Using your pixel font, add the Happy Valentine's Day to each side of the tag.
Then, using the Century Gothic font, Size: 30
Type out 'XO' on each side of the wordart.
New Image - 500x500 - floodfill with the same color as above.
Use the mask on it. Merge Group.
Paste it onto your tag to the left.
Right click the mask layer - Arrange - Send to Bottom
Duplicate it. Image - Mirror.
Now duplicate it one more time and move it to the top.
Add your watermark, a name and now your new tag is all finished!
Paste your wordart over top of the rectangle.
Add drop shadow.
6.
(please see my tag for reference on the placements of everything in this step)
Grab your heart accent from my supplies. Paste to each side at the top of the tag.
Using preset shape tool, draw a small heart. Move to one side of the tag.
Duplicate it. Image - Mirror.
Now, draw a bit larger size heart, and move to the top corner of the rectangle.
Duplicate it. Image - Mirror.
Effects - Texture Effects - Blinds -
Width: 2.00, Opacity: 40.00, Color: white, Horizontal: checked
Using your pixel font, add the Happy Valentine's Day to each side of the tag.
Then, using the Century Gothic font, Size: 30
Type out 'XO' on each side of the wordart.
New Image - 500x500 - floodfill with the same color as above.
Use the mask on it. Merge Group.
Paste it onto your tag to the left.
Right click the mask layer - Arrange - Send to Bottom
Duplicate it. Image - Mirror.
Now duplicate it one more time and move it to the top.
Add your watermark, a name and now your new tag is all finished!
Thank you so much for following along with my tutorial.
©sylvie's tutorials
Written January 4, 2022.
©sylvie's tutorials
Written January 4, 2022.
I turned this tag into a full set.
Here are the other 2 parts of this 3 piece set!
♥
Here are the other 2 parts of this 3 piece set!
♥


Subscribe to:
Posts
(Atom)