Showing posts with label autumn. Show all posts
Showing posts with label autumn. Show all posts
Wednesday, 9 November 2022
AUTUMN SPLENDOR

SUPPLIES NEEDED
Tube - ©Misticheskaya - at PicsForDesign.com - HERE
Scrap Kit - FTU - Autumn Splendor by My Tagging Addiction - HERE
Template - by Melissa, on Creative Misfits Blog - HERE
(I used template 01)
Fonts Used:
Adova Zombia & Pussycat - for the Wordart
& Advantage - for the name
Mask - Vix - Mask 229 - HERE
Plugins Used:
penta.com - Jeans & VTR2
~~~~~~~~~~~~~~~~~~~~~~~~~~~~~~~~~
Okay, let's get started!
1.
Open the template in PSP.
Shift + D and then close the original template.
Image - Canvas Size - 800 x 800
Paste your tube on your canvas.
If using the same one as me, I resized by 35%.
Add a dropshadow, 0, 0, 40, 4.00.
Grab 'leaf scatter 2' from the kit. Paste it to the right of the canvas at the bottom.
Duplicate it, and Image - Mirror.
I moved both underneath the tube layer.
Open 'leaves 3' from the kit and resize by 50%.
I pasted it over top of the leaf scatter - add a dropshadow.
I used 0, 0, 30, 3.00
Duplicate it - Image - Mirror
2.
Time to make a gradient.
Super easy, no worries.
Pick two different colors from the tube you are using.
I chose #d65e0f & #44471b
Once they are in the material palette, click the center of one of the colors
And it should be a gradient with the two colors in your material palette.
Use these settings:

3.
I hide all original layers after I'm done with them,
so there is no outline with these next steps.
Click on the large orange rectangles layer
Selections - Select All
Selections - Float
Selections - Defloat
Add a new raster layer and floodfill with the gradient we just made.
Selections - None
Now paste your tube over top of the gradient layer we just made
Place it exactly where you want it.
Duplicate it - Image - Mirror so they're on each side
Duplicate each again, and change the blend modes
Bottom: Luminance (Legacy) and Top: Screen
I trimmed the tubes so they weren't showing in the middle rectangle.
4.
Click on the black frame around the rectangles we just added a gradient to, so it's active.
Selections - Select All
Selections - Float
Selections - Defloat
Add a new raster layer and floodfill with a darker color from your tube.
I chose #254618
Selections - None
Effects - Plugins - penta.com - Jeans - default settings
Add a dropshadow, I used 0, 0, 40, 4.00
5.
Open paper1 from the kit, and resize by 77%
Click on the 2 darker grey rectangles that come from each corner of the rectangles we just worked with.
Paste the paper over top of them.
Click on the grey rectangles to make them active again.
Selections - Select All
Selections - Float
Selections - Defloat
Selections - Invert
Click on the paper layer again and hit the delete key.
Add a dropshadow to them.
Repeat these same steps to add paper 4 to the long dark grey rectangle near the bottom of the template.
6.
Click on the layer with two diagonal rectangles (very bottom layer on template)
Selections - Select All
Selections - Float
Selections - Defloat
Add a new raster layer and floodfill with the same dark green we added for the frame.
Selections - None
Adjust - Add/Remove Noise - Add Noise
Random - 18% - Monochrome: checked
Add a dropshadow now.
Click on the two black rectangles layer.
I added the color #d35e0f
Effects - Plugins - Penta.com - VTR2 - default settings
Add a dropshadow to them, same as before.
Lastly, the leaf layers.
I used the dark green and yellow for the black leaves and orange for the grey.
I also added some noise to the orange ones, same method as above except the percentage is 8.
This is what I have now:
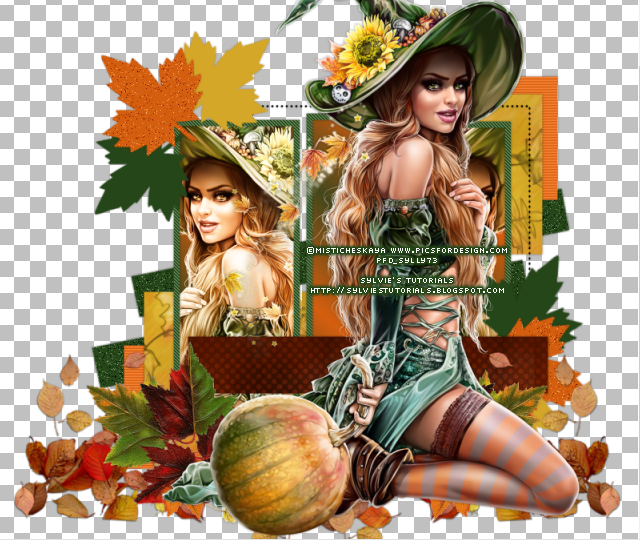
Now just to add last bits.
I added a dropshadow of 0, 0, 30, 3.00 to each of these.
See my tag for reference or add it where you'd like it!
Leaves 3 - resize by 40% this time
branch 2 - no resizing needed
leaves 1 - resize by 60%
cluster 5 - resize by 70%
corn - resize by 40%
tree - no resizing needed
Now, using the fonts above (or fonts of your own)
Type the words AUTUMN and Splendor
I used Pussycat size 65 for AUTUMN and Adova Zombia size 48 for Splendor.
Now add the mask, using the dark green .
Add your sparkles, copyright and name.
We are all finished!
Thank you so much for following along!
♥
© sylvie's tutorials.
Written November 9, 2022.
Tuesday, 6 September 2022
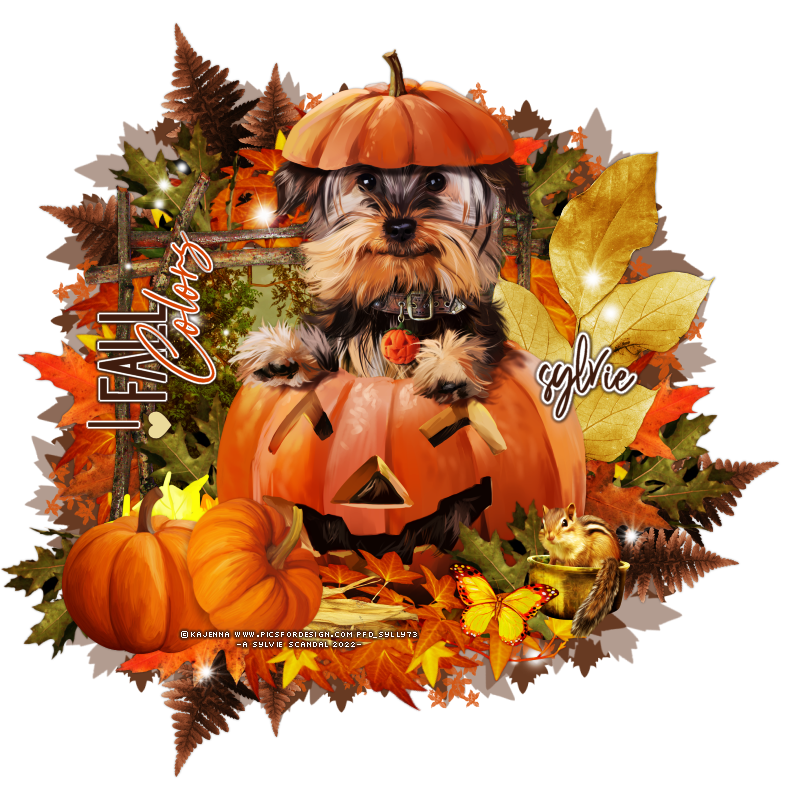
Tube - Autumn by Kajenna - HERE
Kit - Fall Colors - FTU by Scrappy Bit of Fun - HERE
Plugins: Mura's Meister - Copies & Penta.com - Jeans
Mask - by me - sylly creationz - grab the mask at Creative Misfits blog - HERE
Gradient - I used one by Tonya's Temptations, but made for Misfits, not on her blog
(any gradient will do, however)
Fonts Used -
♥
~~~~~~~~~~~~~~~~~~~~~~~~~~~~~~~~~~~~~~
Okay, let's get started!
1.
New Image - 750 x 750 - transparent
Open frame 8 and paste it to your canvas.
Element 45 - resize by 70%
Effects - Plugins - Mura's Meister
Move this layer beneath the frame.
Element 27 - resize by 70%
I placed it four places around the frame, removing excess not needed.
Element 2 - resize by 50%
Paste it to the left of the frame at bottom.
2.
Element 29 - resize by 50%.
Move it to the right side, over top of the leaves we just added.
I duplicated it and placed it in 3 more places too.
I did the same, placed it in four different places around the frame.
This is what I have now.

3.
Paste your tube onto the canvas, I resized by 30%.
I put it right beneath my tube, coming out from behind the 2 pumpkins to the left.
Element 30 - Resize by 30% and put to the right of your tube.
Element 60 - resize by 40%
I put it over to the left of the chipmunk.
Frame 7 - no resizing needed
Right click the layer
Arrange - Send to Bottom
Move it so it's coming out from the left side and bottom
Duplicate - Image - Mirror
Image - Flip
It should be coming out from behind right side and top now.
Element 37 - resize by 35%
I made it come out from behind the two pumpkins at the bottom of the tag.
4.
Paper 15 - resize by 60%
Paste to canvas right beneath your main frame layer.
Move it to where you want it exactly.
Using your magic wand tool, click inside of the main frame
Selections - Modify - Expand by 8
Selections - Invert
Click on the paper layer and hit the delete key.
Selections - None
Add sparkles of choice
I put mine beneath the main tube layer.
Now, add the mask , the copyright and name
We are all finished now, YAY!
Thank you for trying my tutorial!
♥
© sylvie's tutorials.
Written September 6, 2022.
Monday, 22 August 2022

Tube - by Kajenna at PicsForDesign - HERE
Scrap Kit - FTU - Crazy Cat Creations - Falling For Autumn - HERE
Mask - My autumn mask on Creative Misfits Blog - HERE
(it's the two at the very bottom of the post)
Fonts Used: Fixed_01 (pixel) HERE
Wordart Fonts: Pharmacy - HERE, Starfish - HERE
~~~~~~~~~~~~~~~~~~~~~~~~~~~~~~~~~~~~~
Okay, let's get started!
1.
New Image - 750 x 750 - transparent
Open up the frame 'ele 8' from the scrap kit, paste to canvas.
Resize by 70%.
Now, open 'ele17' and resize it by 50%.
Paste to your canvas at the bottom of the frame and add a dropshadow of choice.
Image - Rotate - Free Rotate by 90% to the left.
Move it to the right of the tag, and lower it beneath all layers.
Make it come out from behind the frame some.
Duplicate the layer - Image - Mirror
Now, click on the element on the bottom once again.
Duplicate it, and move it to the top of the tag.
Right click the layer
Arrange - Send to Bottom
Make it come out from behind the frame at the top.
Layers - Merge - Merge Visible
You should now have this:

2.
Paste your tube over top of the frame.
Add a dropshadow of choice.
Open 'ele2' from the kit, resize by 10% and place it next to the tube to the right.
'Ele9' - resize by 20%. Paste to the left of the tube.
Then, paste 'ele13', resized by 40%, just beneath the mushroom.
Add dropshadow to them both.
Now, 'ele6' and resize by 25%.
Paste it just above the mushroom, and add dropshadow.
Grab 'ele1' - resize 25% - and paste it just beneath the tube to the right at the bottom of the tag.
'Ele5' - resize by 20%, and paste at the top of the frame.
'Ele11' - resize by 20%, and paste under the pumpkin just above it a bit.
3.
Using two colors from your tag, create a gradient.
(I used #fea814 and #7d4b00)
Click on your frame layer to make it active.
Now, using your Magic Wand Tool, click the inside of the frame.
Selections - Select All
Selections - Modify - Expand by 10
Add a new raster layer.
Floodfill with your gradient you just made.
Selections - None.
Now, duplicate your tube, and lower this one just over the gradient
and make it come out from behind your current tube to the left.
Click the gradient layer.
Selections - Select All
Selections - Float
Selections - Defloat
Selections - Invert
Click on your tube layer you just placed over the gradient, and hit the delete key.
Change the blend mode to Luminance (Legacy)
4.
Using a pixel font - color: white
Type the words 'Autumn Vibes' across the gradient/tube layer.
I made a few rows of it and lowered it to the bottom part within the frame.
I changed the blend mode to Overlay, and then lowered the opacity to 44.
5.
Now add the mask, I used the gradient we made earlier for the mask.
Add sparkles of choice to the tag.
Add your wordart using the fonts listed above.
And lastly, add your watermark and save!
Thank you so much for following along and trying my tutorial.
Written August 23, 2022.
Subscribe to:
Posts
(Atom)