Tuesday, 18 October 2022
06:52 | Edit Post
Witches Brew

SUPPLIES NEEDED
Tube - ©Verymany - Witch_19 - HERE
Scrap Kit - Manipulated by Magik - PTU - Witches Brew - HERE
Plugins: penta.com - Jeans
Preset Shape Tool - Rectangle
Masks: My mask at sylly creationz - Mask 038 - HERE
Also PSP Masks by the Asylum - Heidi Vargas HERE
I used 1119 - HERE and 1305 HERE
Autumn Leaves - at Clean Png - HERE
Fonts Used: Impact, Scary Halloween, Adova Zombia (the name)
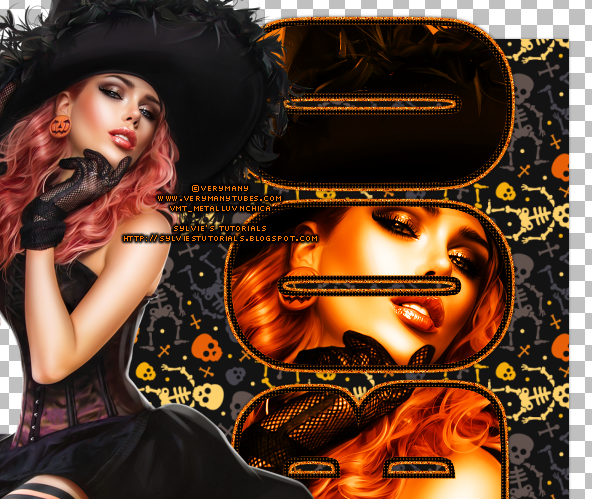
If you don't have or can't find Impact font, I've typed the word BOO out for you using it.
Just click on the image to make it full size, then right click and save
~~~~~~~~~~~~~~~~~~~~~~~~~~~~~~~~~~
Okay, let's get started!
1.
File - New - New Image - 800 x 800 - transparent
Paste the tube you are using onto the canvas. Move it far left.
If the same as mine, I resized by 50%.
Using the Impact font, size 250 and color #fb7a06, type the word BOO
Convert to a raster layer.
Selections - Select All
Selections - Float
Selections - Defloat
Selections - Modify - Expand by 5
Add a new raster layer
Floodfill with black and lower it beneath the BOO layer
Now add another new raster layer and keep it above the black layer
On your material palette, click the middle button under the color orange called 'texture'
Click on the center of the color now and choose 'Grid' in the dropdown to the right
Angle: 0 Scale: 48
Floodfill the new raster layer with this texture
Selections - Modify - Expand by 3
Floodfill it with the orange again and lower it beneath the black layer
Selections - None.
Make the orange bottom layer active
Adjust - Add/Remove Noise - Add Noise
Random - 42% - Monochrome: checked
Add a dropshadow of choice to your black letter layer and the noisy letter layer.
(Trim any excess from the tube to ensure your tube is fitting on your canvas, so there is no overlap)
Click on the original BOO layer to make it active
Selections - Select All
Selections - Float
Selections - Defloat
Selections - Invert
Click on the tube layer and hit the delete key.
Selections - None
Duplicate the tube layer now
Bottom layer change the blend mode to Luminance (Legacy)
Top layer change the blend mode to Overlay
Hide your main tube layer to the left
Layers - Merge - Merge Visible
Now unhide your main tube layer again.
You should now have the tube, and the merged Boo layers.
Now we can move on.
3.
Paste to your canvas and lower to the very bottom layer.
Move it over so it's coming out from beneath the BOO.
Add a dropshadow.
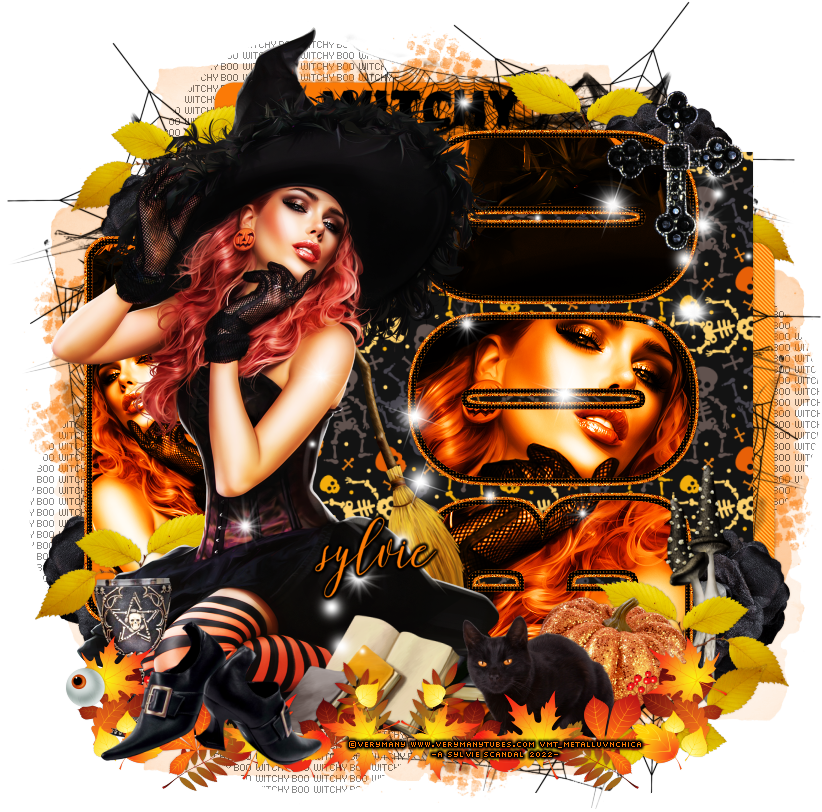
Here is what I have so far:

Now, using your Preset Shape Tool - set to Rectangle
Horizontal Radius: 20 and Vertical Radius: 20
Draw a rectangle to the left of the tube, and then another to the right coming out from under the paper.
To the left one, we're going to add our tube again, using same steps as above.
I also added the black textured layer and noisy layer - again same steps as above around the rectangle
To the right one, apply Penta.com - Jeans - default settings.
See my tag for reference
Add a dropshadow to all rectangular bits.
4.
Elements to add to the tag that I have added:
(You can go on your own and add what you'd like, of course!)
I added a mild dropshadow to each bit also
Please check my tag for reference to placement, if following along!
Element 57 - resize by 40%
Element 9 - no resize necessary
Element 83 - resize by 40%
Element 79 - resize by 50%
Element 93 - resize by 40%
Element 74 - resize by 40%
Element 70 - I separated them and then resized by 80 and 70%
Element 18 - resize by 65%
Element 113 - resize by 40%
Element 97 - resize by 10%
5.
Using the rectangle preset shape tool again
I used the orange again and drew a rectangle coming out from the top of the tag
Lower this layer to the very bottom
Add a dropshadow
Using the font 'Scary Halloween', type the word WITCHY
Add a dropshadow.
Add sparkles of choice
Apply your masks
I used the spiderweb mask to come out from each part of the tag
and then the other masks beneath that.
Now, save this pixel text and apply it in various places around your tag just above the masks.
I lowered the opacity to 55%
Lastly, I added the .png autumn leaves at the bottom of the tag, linked above
I resized by 5% , look at my tag for reference
Once pasted where I want it, I duplicated it
Change the blend mode of the top layer to Overlay and lower the opacity to 54%
Add your copyright and save!
♥
Thank you so much for following along my tutorial!
Happy Halloween guys!
Written October 18, 2022.
Subscribe to:
Post Comments
(Atom)
-me-


Holy cheeseballs!
ReplyDeleteThis looks absolutely amazing, Hun!
Thank you for making my kit look so good. 💖
*hugz*
SO glad you liked it Magik! ♥♥♥
ReplyDelete