Wednesday, 2 November 2022
13:47 | Edit Post
WINTER GREETINGS
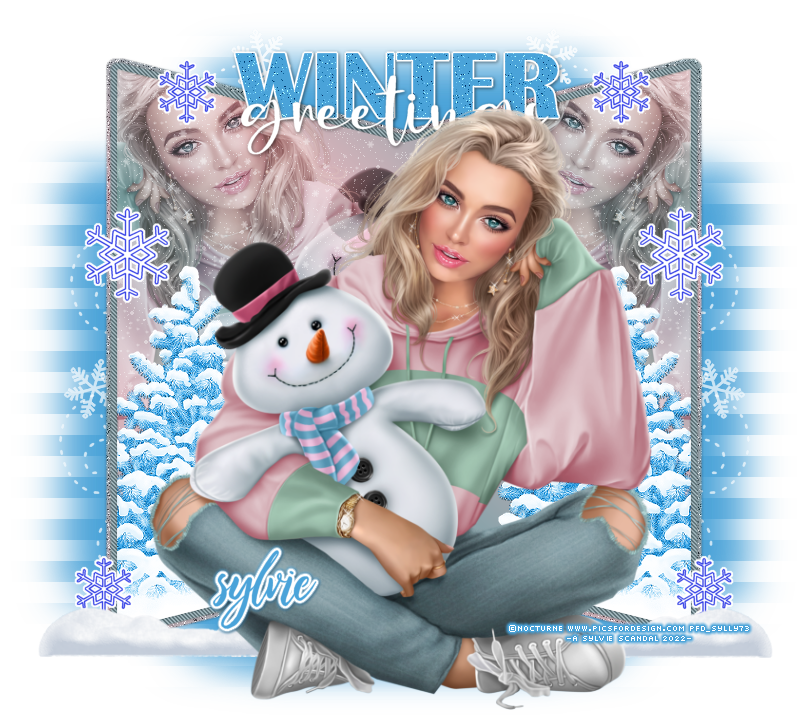
Tube - ©Nocturne - at PicsForDesign - HERE
Preset Shape Tool - Rectangle
Plugins
penta.com - Jeans
DSB Flux - Linear Transmission
My Supplies - (snowflakes, snow, winter tree) - HERE
Some of the doodles are from Lori, blo (doodles from my noodle) blog HERE
~~~~~~~~~~~~~~~~~~~~~~~~~~~~~~~~~~~~~~~~~~~~~~~~
Okay, let's get started!
1.
File - New - New Image - 750 x 750
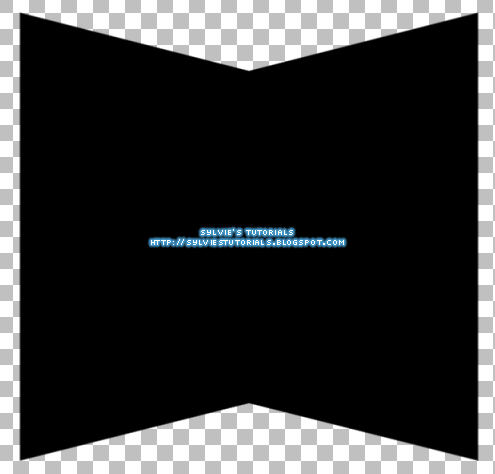
Using your rectangle shape tool, draw a rectangle to the left of your canvas.
Vertical and Horizontal Radius set to 0.00
Convert to a raster layer.
Click on the 'Raster Deform Tool' and change the mode to 'perspective'
Leave all other settings at default.
Using your mouse, click on the nodule that is far right, and pull it down
See pix below:

Layers - Merge - Merge Visible.
You should now have something that looks like this.
2.
Paste the tube you want to use in the center of the card.
Choose two colors from your tube to make a gradient with.
I used #8ba3aa and #d7b3ba
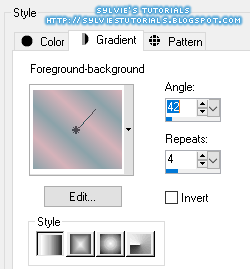
Once you have two chosen colors in your material palette, click on the center of one of the colors.
Choose the gradient tab at the top, and choose 'foreground-background' in the options in the dropdown.
Angle: 42
Repeats: 4
Invert: unchecked
Click on the card template to make it active
Selections - Select All
Selections - Float
Selections - Defloat
Add a new raster layer & floodfill with your gradient you made
Selections - Modify Expand by 7
Add a new raster layer and lower it beneath the gradient layer we just made
Floodfill with a color from your tube, I used #5f747a
Add a new raster layer and lower it beneath the blue layer
Floodfill with the gradient one more time.
Selections - None.
3.
Click on the blue layer
Effects - Plugin Effects - penta.com - Jeans - default settings
Add a dropshadow - I used 0, 0, 40, 4.00
Click on the lowest gradient layer to make it active
Adjust - Add/Remove Noise - Add Noise
Random - 30% - Monochrome: checked
Add a dropshadow, same as before.
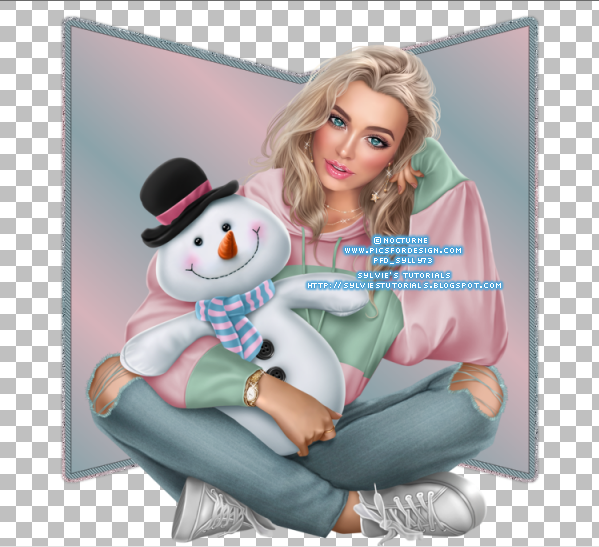
You should now have something like this:
4.
Paste your tube over each side of the card where you would like it to be placed.
(see my tag at the top for reference)
Now, grab the 'winter tree' from my supplies, as well as the falling snow
I pasted the tree on each side of the card over top of the tube
Click on your card template layer
Selections - Float
Selections - Defloat
Selections - Invert
Click on your tube layers and hit the delete key
Click on the tree layers and hit the delete key
Selections - None
Change the blend mode of the tubes to Luminance (Legacy)
And lower the opacity to 50%
Now duplicate them and change the blend modes to Opacity.
Now change the snow layers blend mode to SoftLight
Duplicate them and then lower the opacity to 22%
Click on the main gradient layer and add a dropshadow , same as before.
Add the same dropshadow to the main tube layer.
5.
Paste the snow (SR_Long Ice Icicles & Snow) to each side of the card over top of all of the layers
Now grab one of Lori's snowflakes (ColorfulSnowflakes) and paste to either side of the card.
Then grab a smaller version of the snowflake (same file) to add to the top on each side
Grab my wordart from the supplies, or make one of your own
Paste it to the top of the card.
Using the color #4aa3d9, draw a rectangle slightly bigger than the card on each side.
Objects - Align - Center in Canvas
Convert this layer to a raster layer and lower it to the very bottom layer.
Adjust - Blue - Gaussian Blur - 25.00
Make sure it doesn't go beyond the size of your canvas, if it does use less blur
or make a smaller rectangle.
Effects - Plugins - DSB Flux - Linear Transmission
Use the following settings
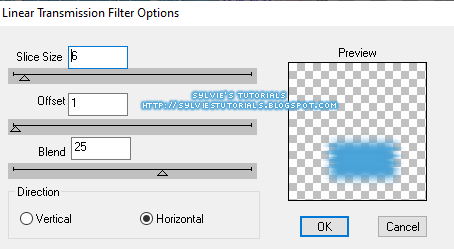
Now, do the same at the top of the tag
Duplicate it, and Image - Flip so it's at the bottom too.
Now open 'snowflakesbyLoriBluesPurples' from the supplies.
Use some of the snowflake doodles on each side of the tag and up at the top.
Lower the opacity to 70.
I changed mine to white but you can use as is too.
♥
Thank you so much for following along my tutorial!
Written November 2, 2022.
Labels:winter,winter greetings
Subscribe to:
Post Comments
(Atom)
-me-


0 comments:
Post a Comment