Tuesday, 30 August 2022
16:16 | Edit Post
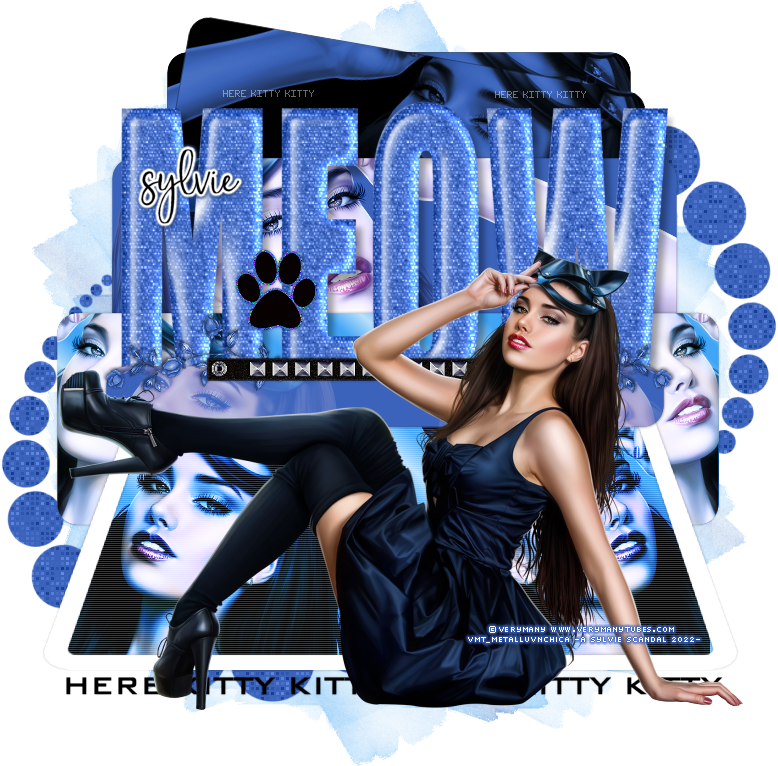
MEOW
Tube - ©Verymany - You can find it HERE
Wordart - MEOW - on my blog sylly creationz - HERE
Gradient - TBT_Bluebells - Tonya's Temptations - HERE
Mask - SophisticatSimone Mask 96 - HERE
Fonts Used - Bank Gothic for Here Kitty Kitty text and Lalisa for the name
Dog & Cat Paws - HERE
Plugins - Xero - Fritillary
My Supplies (frame, roses & narah mask) - HERE
(mask by Narah included, if anyone knows of a link for her masks now
~~~~~~~~~~~~~~~~~~~~~~~~~~~~~~~~~~~~~~~~~~~
Let's get started!
1.
New canvas - 750 x 750 - transparent
Paste the frame from my supplies onto your canvas
Using your magic wand tool, click inside the frame
Selections - Modify - Expand by 6
Add a new raster layer
Move it below the frame layer and floodfill it with your gradient of choice
Selections - Select None.
Add a dropshadow to your frame if you wish.
Now, open the tube you are using, and paste it to your canvas.
Resize as needed.
For this next part, I used a close up version of the tube, but you don't have to.
Grab the closeup version of the tube, and paste it to canvas as well.
Resize as needed. Move it to one side
Duplicate - Image Mirror
Click on the gradient layer to make it active.
Selections - Select All
Selections - Float
Selections - Defloat
Selections - Invert
Click on your tube layers and hit the delete key.
2.
Duplicate the tube layers
Change the blend modes to Luminance (Legacy) on the bottom layer
And Overlay on the top layer.
Hide your main tube layer and the frame layer.
Click on one of the other layers to make it active.
Layers - Merge - Merge Visible
Go to Effects - Texture Effects - Blinds
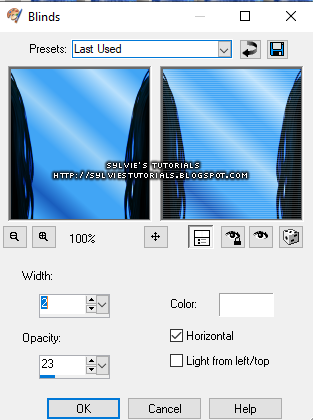
Now, paste the wordart from my supplies, right above the frame layer.
Move it down so it's right where you want it.
3.
Using the rectangle preset shape tool, draw a rectangle lengthwise using same gradient as before.
Horizontal and Vertical Radius set to 20.00
(this will draw the rectangle with rounded corners)
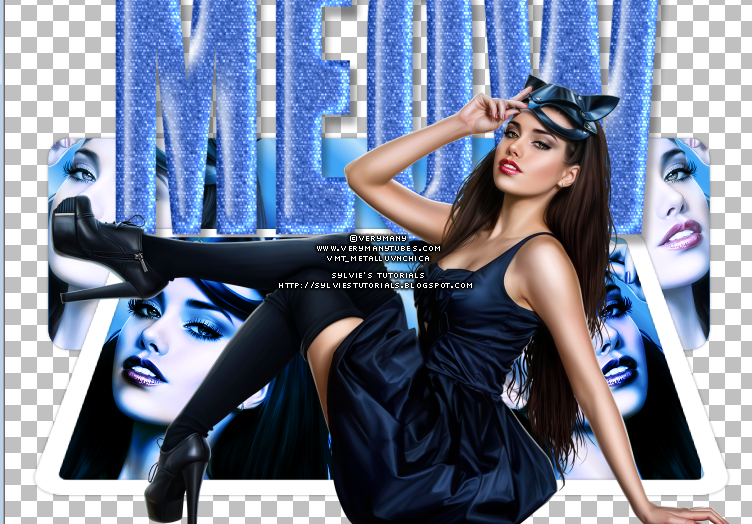
I lowered it so it comes from behind the frame and the wordart.
Here is what I have so far.
4.
Using the same method as above, add your tubes to this rectangle.
When changing blend modes though, use Screen for the top instead of Overlay.
Now with the color #3b63bb draw another rectangle and make it shorter than the wordart but coming down behind the rectangle we just drew.
Once again, using the method we used above, add your tube.
Add dropshadow to your rectangle layers.
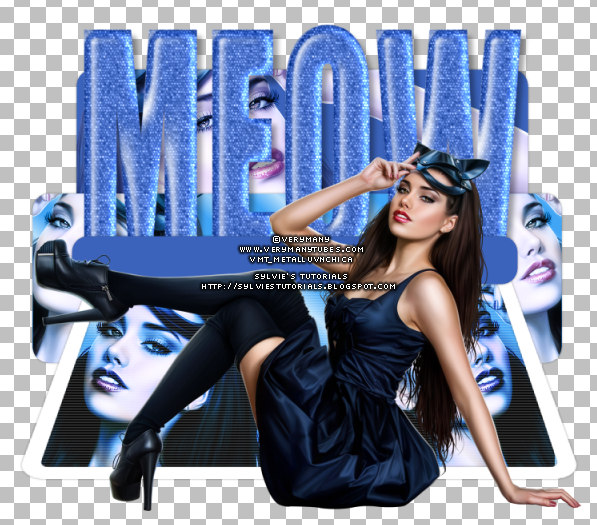
Now, using that same blue, draw a smaller rectangle right over the wordart layer.
Here is what my tag looks like now.
5.
I added the close up tube to the small rectangle, using the same method as above.
Change the blend mode to Screen.
Add a dropshadow to the rectangle layer.
Paste your spike bracelet to your canvas.
Resize by 80%.
Adjust - Sharpness - Sharpen
Add a dropshadow and place it right over the smaller rectangle.
Now, add the roses supplied in my supplies.
Place it at the top of the small rectangle and lower the layer right beneath the spike bracelet.
Add a dropshadow.
Open the Narah mask from my supplies
New Image - 550 x 550
floodfill with the same blue as above
Apply your mask now.
Layers - Merge - Merge Group
Copy and paste it to your tag canvas, and move it to the left of the tag.
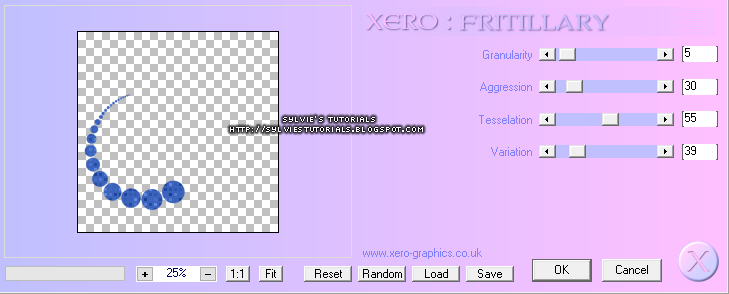
Effects - Xero - Fritillary - settings below
Now duplicate it
Image - Mirror
Image - Flip
6.
Using your rectangle preset shape tool again, color: black
Draw a rectangle coming out from the top of the tag now.
I merged them together
(the black rectangle and the tube added)
Adjust - Hue & Saturation - Colorize
Hue: 156
Saturation: 133
Now Duplicate it.
Image - Rotate - Free Rotate by 10% to the right
7.
Using color black and font of choice
(I used Bank Gothic)
Type the words Here Kitty Kitty at the bottom of the tag.
Now add the paw print, resize by 15%.
Selections - Select All
Selections - Float
Selections - Defloat
Selections - Modify - Expand by 2
Add a new raster layer and floodfill with the blue we used earlier.
Selections - None
Move this layer beneath the paw print.
Add noise and a dropshadow. Place it over the wordart.
Add the SophisticatSimone Mask, I used the gradient again for this
And then lowered the opacity to 64.
Using the pixel font 'Fixed_01', I added the words Here Kitty Kitty
And lowered the opacity to 42 and placed them right over the MEOW wordart.
Add your name and your copyright.
Also add sparkles of choice, if you want them.
That is it for this tag!
Thank you for following along
♥
© sylvie's tutorials.
Written August 30, 2022.
Subscribe to:
Post Comments
(Atom)
-me-



0 comments:
Post a Comment