Monday, 22 August 2022
20:18 | Edit Post
FLEUR
Tube - Lua by Alicia Mujica - HERE
Scrap Kit - FTU - Love Is In The Air by Bits n' Bobs - HERE
Gradient - TBT_XmasFurryFun - by Tonya's Temptations - HERE
(miss you so much my friend)
Preset Shape - Rectangle
Masks - by Dangerously Delicious Designs - HERE and HERE
(I used DD_Mask11 & DD_AssortedMask_1)
Fonts Used: Angelic Serif HERE
My Supplies: HERE
~~~~~~~~~~~~~~~~~~~~~~~~~~~~~~~~~~
Okay, let's get started!
1.
New canvas - 750 x 750 - Transparent
Paste the frame 'E9' onto the canvas
Now grab the element 'E39' and paste it onto the canvas.
Pull the layer down below the frame, and move it up some..
(so it comes up higher from the frame than it originally was when centered)
Duplicate this layer
Image - Flip
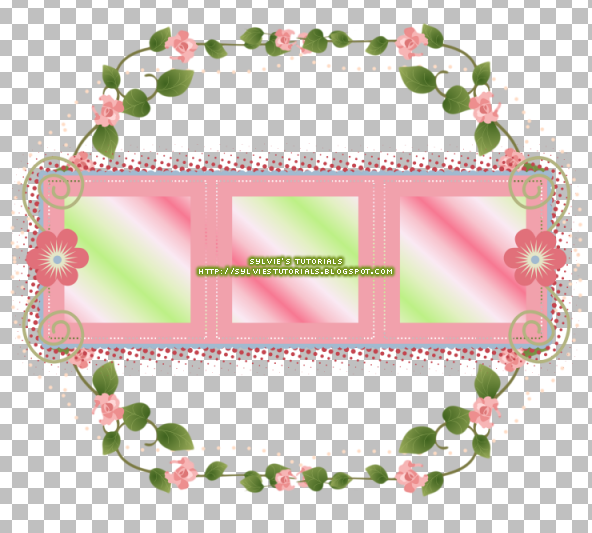
You should now have something that looks like this.
Using your Selection Tool, draw a rectangle around the top part of the frame
Now, click on the layer that is more at the bottom.
Hit the delete key.
Now, do the same for the upper frame..
Draw using the selection tool again, but the bottom part of the frame and underneath.
Click on the layer that is more at the top.
And hit the delete key.
This is what you should now have.

3.
Paste your tube onto your canvas.
Add a dropshadow of choice.
Choose a gradient and draw a rectangle using it a bit smaller than the frame.
Move it beneath your frame layer, but over top of the leaves and flowers layer.
Take a part of your tube and paste it over the gradient layer.
I added the face, then duplicated it.
Image - Mirror.
Hide all layers except your face layers.
Click on one of the two layers to make it active.
Layers - Merge - Merge Visible.
Unhide your layers again.
Duplicate the merged layer.
The top one, change it to 'Overlay'.
Now hide your tube, frame and leaves and flowers.
Click on the gradient to make it active.
Layers - Merge - Merge Visible.
Unhide the other layers.
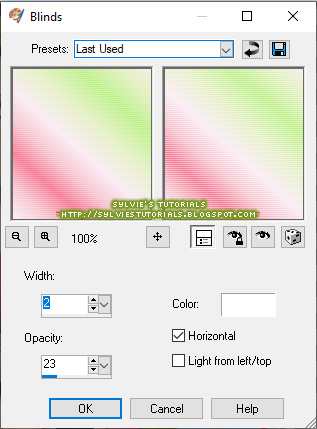
Effects - Texture Effects - Blinds

4.
Click on your frame layer, and add a dropshadow.
Open element 'E55' and resize it by 25%.
Paste it to the bottom corner of the frame, just beneath the pink flower.
(see my tag for reference)
5.
If you haven't already, merge your two flower and leaf layers now.
Using your magic wand tool, click inside of the frame so the marching ants are only inside the frame.
Selections - Select All
Selections - Modify - Expand by 3
Add a new raster layer
Floodfill with the same gradient you chose to use before.
Duplicate the tube layer.
Now, add your tube just above that gradient layer.
I used the full version of the tube this time.
Move it to the left of the tube and then duplicate it
Image - Mirror
Now click on the gradient layer.
Selections - Select All
Selections - Float
Selections - Defloat
Selections - Invert
Click on your tube layer and hit delete key
Now click on the other tube layer and click delete again.
Your tubes should now be within that frame.
Duplicate them and change the blend modes
Bottom - Luminance (Legacy)
Top - Screen
Then lower the opacity of the lower ones to 54.
6.
Now, grab element 'E1' from the kit and paste it over the frame and behind the tube.
Grab the supplies from my link above.
Resize the 'md-prettyflowers' to 70% and paste it under the tube over the middle part of the frame.
Open the 'shasta daisies' and i used the left daisy on the bottom row.
Paste it to the left of your frame and then once over top to the right.
7.
Now it's time to open add your mask.
Add your sparkles of choice and watermark.
You are now finished with the tag!
Thank you so much for trying my tutorial.
♥
© sylvie's tutorials.
Written August 22, 2022.
Subscribe to:
Post Comments
(Atom)
-me-


0 comments:
Post a Comment