Wednesday, 4 December 2019
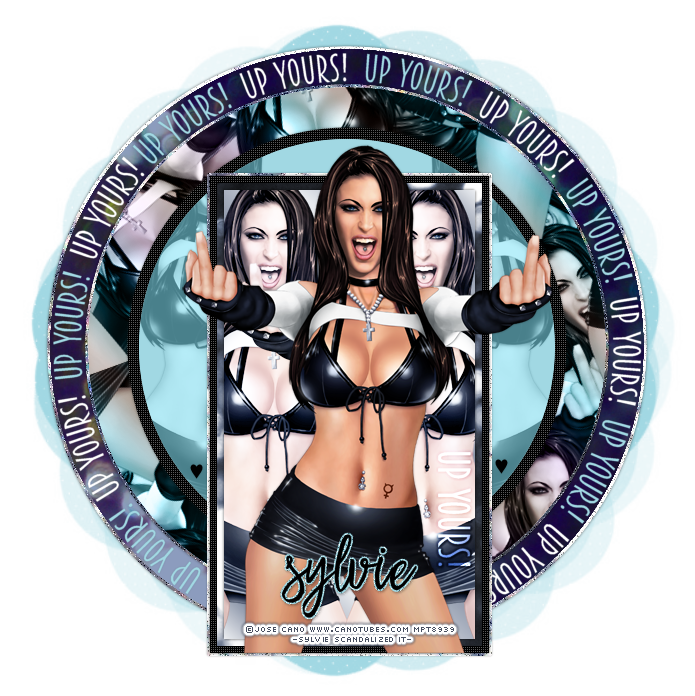
UP YOURS!
Materials Needed:
Tube - I used José Cano purchased at MPT
You can purchase this tube HERE now at Canotubes.com
Preset Shapes - I used rectangle & circle (comes with PSP)
Texture 1: Shimmer Bokeh1 HERE
Texture 2: Bokeh (Pollywaffle) 14 HERE
Font: Breamcatcher HERE
Font for name: My Dear Santa
Plugins: penta.com - color dot, mura's meister - copies
Mask: Vix_mask232 HERE
Resemblance to any other tag or tutorial is purely coincidental.
My tutorials come from my lil' 'ol tired but creative brain, lol.
1.
New Image - 700x700 transparent canvas.
Copy and paste your tube of choice onto your canvas.
2.
Let's start by activating your circle preset shape tool.
Create on vector: checked, H - 0, V-0, Width: 0.00 and anti-alias: checked, color: #474f60
Draw out a circle, that takes up a good part of your canvas.
Now, activate your rectangle preset tool, and draw a rectangle around your tube. I used black.
Make sure the top of the rectangle is around her neckline, & bottom where her legs cut off.
Rename your circle, rectangle and tube layer accordingly.
(all pictured in the preview below)

3.
Now, open up texture 1, texture 2 and a gradient of choice.
I made my own gradient using matching colors in my tag, but any will do.
Resize texture 1 by 35%, then paste onto your canvas under your rectangle layer.
Activate your rectangle layer in your layer palette.
Selections - All
Selections - Float
Selections - Defloat
Selections - Modify - Expand by 3
Selections - Invert - and then click on the texture layer and hit delete key on your keyboard.
Selections - None.
Adjust - Add/Remove Noise - Add Noise - Random: checked, 33%, Monochrome: checked.
Add drop shadow of 0, 0, 30, 3.00.
4.
Now, make your rectangle layer active again.
Selections - All, Selections - Float, Selections - Defloat
Selections - Modify - Contract by 6
Resize texture 2 (same %) and paste it over top of the rectangle layer & move it so it covers it.
Selections - Invert.
Hit the delete key, and do not deselect it yet.
Now, go to Selections - Modify - Contract by 6 again.
Add a new raster layer just above the texture 2 layer, and floodfill it with your gradient.
Selections - None.
5.
Duplicate your tube layer, and drop it down just above your gradient layer.
Duplicate it then Image - Mirror. You should have a tube on either side of the main tube now.
Hide all layers except the 2 tubes just above the gradient. Merge Visible.
Unhide all other layers again.
Activate your gradient layer, Selections - All, Selections - Float, Selections - Defloat.
Click on your double tube layer again.
Selections - Invert and hit delete on the keyboard.
Now, duplicate your double tube layer.
Bottom double tube layer, change the blend mode to Luminance (Legacy).
The top double tube layer, change the blend mode to Screen.
Activate the gradient rectangle, add dropshadow 1, 1, 40, 4.00, and then -1, -1, 40, 4.00.
Now, activate your texture 2 layer and add a dropshadow of 0, 0, 30, 3.00.
Adjust - Hue & Saturation - Colorize: Hue: 156 & Saturation: 38.
Lastly, go to the black rectangle layer.
Effects - Penta.com - Color dot - original settings. Add dropshadow 0, 0, 30, 3.00.
6.
Now, open your Breamcatcher font.
Color: White, Size 30 - Type the words Up Yours! and convert to a raster layer.
Image - rotate by 90% to the right and place it just over top of your double tube layers.
Change your blend mode to overlay, and then duplicate the layer so it shows up more.

7.
Now, some repetitive stuff for the circle layer, so I'll keep this simple.
Just follow the steps above if you don't remember them accurately.
Use texture 1 for the edge of the circle, once again expanding by 3.
The only difference is that I resized the texture by 40% this time instead of 35%.
But if your circle is smaller than mine you won't need to.
Add the same noise and dropshadow 0, 0, 40, 4.00.
8.
Now, activate your blue circle layer.
Selections - All, Selections - Float, Selections - Defloat, Selections - Modify - Contract by 35.
Add new raster layer and paste your texture 1 again over top of your circle layer.
Selections - Invert and hit the delete key. Do not deselect.
Selections - Modify - Contract by 3. Add a new raster layer and floodfill with your gradient.
Selections - None.
Activate your texture one layer and add noise (same) & drop shadow 0, 0, 40, 4.00 again.
Duplicate your single tube, and move it just above your gradient texture.
Go to Mura's Meister, Copies, Wallpaper (rotate), and change number to 54.
Now you'll see your tubes wallpapered across your canvas, don't panic!
Go to your gradient layer right below the wallpapered layer.
Selections - All, Selections - Float, Selections - Defloat, Selections - Invert
And hit delete on your wallpaper layer.
Duplicate your wallpapered tubes layer.
The bottom one, change your blend mode to Luminance (legacy).
The top, change it to Overlay and lower the opacity to 22.
9.
Using your circle preset shape again, draw a smaller circle, place it over wallpapered tubes.
Add a drop shadow of 0, 0, 40, 4.00. I chose black for my circle. Add penta - color dot again.
Now draw another circle a bit smaller over that one, I used #a1d8e3 for the color.
I then pasted a tube to each side again, merged them, inverted and deleted the excess.
Change the blend mode to Luminance (Legacy) and lower the opacity to 44.
Paste your texture 2 over top of the blue circle layer, cut the excess like previous times.
Change the blend mode to opacity, and then activate the blue circle; add dropshadow.
10.
Last finishing touches to the tag now.
Add the circular text 'Up Yours' using Breamcatcher font again, colors: white & light blue.
Lower it to the layer just above the dark blue circle layer and texture 2.
If you don't know how to do circle text, I have a tutorial for that, click HERE.
Add your mask of choice, your copyright and your name.
Woohoooooo, we're all finished!
I made mine into a full 3 piece set.
Here are the other 2 pieces!


©sylvie's tutorials
Written December 4, 2019.
Materials Needed:
Tube - I used José Cano purchased at MPT
You can purchase this tube HERE now at Canotubes.com
Preset Shapes - I used rectangle & circle (comes with PSP)
Texture 1: Shimmer Bokeh1 HERE
Texture 2: Bokeh (Pollywaffle) 14 HERE
Font: Breamcatcher HERE
Font for name: My Dear Santa
Plugins: penta.com - color dot, mura's meister - copies
Mask: Vix_mask232 HERE
Resemblance to any other tag or tutorial is purely coincidental.
My tutorials come from my lil' 'ol tired but creative brain, lol.
1.
New Image - 700x700 transparent canvas.
Copy and paste your tube of choice onto your canvas.
2.
Let's start by activating your circle preset shape tool.
Create on vector: checked, H - 0, V-0, Width: 0.00 and anti-alias: checked, color: #474f60
Draw out a circle, that takes up a good part of your canvas.
Now, activate your rectangle preset tool, and draw a rectangle around your tube. I used black.
Make sure the top of the rectangle is around her neckline, & bottom where her legs cut off.
Rename your circle, rectangle and tube layer accordingly.
(all pictured in the preview below)
3.
Now, open up texture 1, texture 2 and a gradient of choice.
I made my own gradient using matching colors in my tag, but any will do.
Resize texture 1 by 35%, then paste onto your canvas under your rectangle layer.
Activate your rectangle layer in your layer palette.
Selections - All
Selections - Float
Selections - Defloat
Selections - Modify - Expand by 3
Selections - Invert - and then click on the texture layer and hit delete key on your keyboard.
Selections - None.
Adjust - Add/Remove Noise - Add Noise - Random: checked, 33%, Monochrome: checked.
Add drop shadow of 0, 0, 30, 3.00.
4.
Now, make your rectangle layer active again.
Selections - All, Selections - Float, Selections - Defloat
Selections - Modify - Contract by 6
Resize texture 2 (same %) and paste it over top of the rectangle layer & move it so it covers it.
Selections - Invert.
Hit the delete key, and do not deselect it yet.
Now, go to Selections - Modify - Contract by 6 again.
Add a new raster layer just above the texture 2 layer, and floodfill it with your gradient.
Selections - None.
5.
Duplicate your tube layer, and drop it down just above your gradient layer.
Duplicate it then Image - Mirror. You should have a tube on either side of the main tube now.
Hide all layers except the 2 tubes just above the gradient. Merge Visible.
Unhide all other layers again.
Activate your gradient layer, Selections - All, Selections - Float, Selections - Defloat.
Click on your double tube layer again.
Selections - Invert and hit delete on the keyboard.
Now, duplicate your double tube layer.
Bottom double tube layer, change the blend mode to Luminance (Legacy).
The top double tube layer, change the blend mode to Screen.
Activate the gradient rectangle, add dropshadow 1, 1, 40, 4.00, and then -1, -1, 40, 4.00.
Now, activate your texture 2 layer and add a dropshadow of 0, 0, 30, 3.00.
Adjust - Hue & Saturation - Colorize: Hue: 156 & Saturation: 38.
Lastly, go to the black rectangle layer.
Effects - Penta.com - Color dot - original settings. Add dropshadow 0, 0, 30, 3.00.
6.
Now, open your Breamcatcher font.
Color: White, Size 30 - Type the words Up Yours! and convert to a raster layer.
Image - rotate by 90% to the right and place it just over top of your double tube layers.
Change your blend mode to overlay, and then duplicate the layer so it shows up more.
7.
Now, some repetitive stuff for the circle layer, so I'll keep this simple.
Just follow the steps above if you don't remember them accurately.
Use texture 1 for the edge of the circle, once again expanding by 3.
The only difference is that I resized the texture by 40% this time instead of 35%.
But if your circle is smaller than mine you won't need to.
Add the same noise and dropshadow 0, 0, 40, 4.00.
8.
Now, activate your blue circle layer.
Selections - All, Selections - Float, Selections - Defloat, Selections - Modify - Contract by 35.
Add new raster layer and paste your texture 1 again over top of your circle layer.
Selections - Invert and hit the delete key. Do not deselect.
Selections - Modify - Contract by 3. Add a new raster layer and floodfill with your gradient.
Selections - None.
Activate your texture one layer and add noise (same) & drop shadow 0, 0, 40, 4.00 again.
Duplicate your single tube, and move it just above your gradient texture.
Go to Mura's Meister, Copies, Wallpaper (rotate), and change number to 54.
Now you'll see your tubes wallpapered across your canvas, don't panic!
Go to your gradient layer right below the wallpapered layer.
Selections - All, Selections - Float, Selections - Defloat, Selections - Invert
And hit delete on your wallpaper layer.
Duplicate your wallpapered tubes layer.
The bottom one, change your blend mode to Luminance (legacy).
The top, change it to Overlay and lower the opacity to 22.
9.
Using your circle preset shape again, draw a smaller circle, place it over wallpapered tubes.
Add a drop shadow of 0, 0, 40, 4.00. I chose black for my circle. Add penta - color dot again.
Now draw another circle a bit smaller over that one, I used #a1d8e3 for the color.
I then pasted a tube to each side again, merged them, inverted and deleted the excess.
Change the blend mode to Luminance (Legacy) and lower the opacity to 44.
Paste your texture 2 over top of the blue circle layer, cut the excess like previous times.
Change the blend mode to opacity, and then activate the blue circle; add dropshadow.
10.
Last finishing touches to the tag now.
Add the circular text 'Up Yours' using Breamcatcher font again, colors: white & light blue.
Lower it to the layer just above the dark blue circle layer and texture 2.
If you don't know how to do circle text, I have a tutorial for that, click HERE.
Add your mask of choice, your copyright and your name.
Woohoooooo, we're all finished!
I made mine into a full 3 piece set.
Here are the other 2 pieces!
©sylvie's tutorials
Written December 4, 2019.
Subscribe to:
Post Comments
(Atom)


thanks great tut xxx
ReplyDelete