Showing posts with label attitude. Show all posts
Showing posts with label attitude. Show all posts
Thursday, 12 May 2022
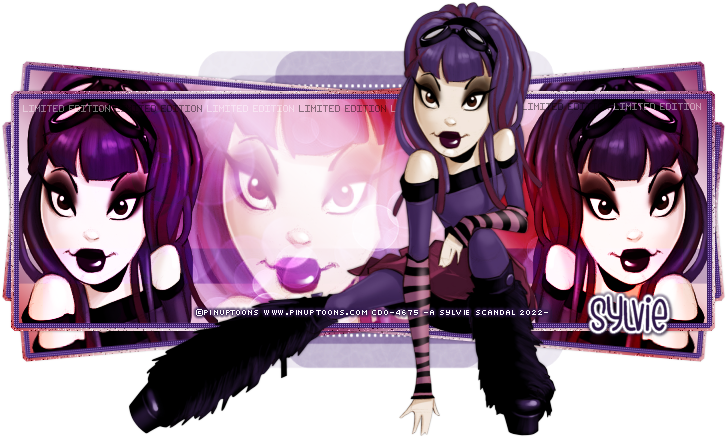
LIMITED EDITION

Supplies
TUBE - Pinuptoons 100-3 - Available at CDO HERE
FRAME - Available on my blog - sylly creationz - for download HERE
GRADIENT - Tonya's Temptations - TBT_Autumn18_13 - Blog HERE
TEXTURE or PAPER of choice - I used a rainbow bokeh pattern, but can't provide it sorry.
MASK - Vix Mask 458 - Download HERE
Fonts Used
Impact: for words inside frame
Fixed_01 - pixel font
Flying Foxes - font used for the name
Preset Shapes
heart
rectangle
SUPPLIES (accents) - Download HERE
Okay, let's get this party started.
1.
New - New Image - 750 x 750.
Paste the tube onto your canvas - resize by 60%.
Paste your frame of choice onto your canvas, I used #9 - Purple.
Move your tube to the right of your frame, as pictured above.
Add dropshadow, I used 0, 0, 30, 3.00.
Now add a dropshadow to your frame also. Same one.
2.
Set your material palette to your gradient of choice.
Using your preset shape tool, draw a rectangle beneath your frame so that both open areas are filled in.
Paste a part of your tube on one side of the frame over the gradient layer.
Duplicate the tube, and change the blend mode on the bottom to 'Luminance Legacy'
Change the blend mode on the top one to 'Soft Light'
Now duplicate them both - Image - Mirror so that it's on the other side too.
I also added the tube to the center of the frame.
Adjust - Hue: 0 Saturation: 0 to make it monochrome
Trim the tube, and then lower the opacity to 6.
With your preset shape tool set to rectangle, draw a rectangle over the tubes, color #60457a
Now change that blend mode on that layer to 'Overlay'.
Make sure that layer is directly above the tubes layer.
3.
Paste your texture of choice over top of the gradient layer.
Trim it so it is not coming from behind the frame on sides, top or bottom.
If necessary, change the color to match your tag colors.
I changed mine to Hue - 192; Saturation - 71
Now change the blend mode of the texture layer to 'Overlay'.
Using the color #60457a - I typed the words 'LIMITED' and 'EDITION'
I used 'Impact' font, size 48.
Rotate them by 90 degrees and place them right between the texture and tube layers.
Hide the main tube layer, merge all other layers.
Layers - Merge - Merge Visible
Unhide your tube layer again.
So far, this is what you should have:

4.
Now, using your preset shape tool again, draw a rectangle coming out from top of the frame.
I used all the same steps as above, using the texture, tubes and blend modes.
For the closeup in the middle, I used blend modes: Luminance (Legacy) & Screen.
Hide the frame and tube layers, and merge visible the rest of the layers.
Now with that layer active:
Selections - Select All
Selections - Float
Selections - Defloat
Selections - Modify - Expand by 4
Add a new raster layer and flood fill with the gradient again.
Lower it beneath the rectangle layer we just made.
Adjust - Add/Remove Noise - Add Noise
Random - 20% - Monochrome: Checked
Add a dropshadow.
Now, merge visible once again.
Duplicate this layer.
Duplicate the rotated one - Image - Mirror
Make the rectangle layer active again.
Duplicate once again - Image - Rotate - Free Rotated by 5%
Right click the layer, Arrange - Send to Bottom
Bring it out from behind the frame to the right
(see my tag for reference)
Duplicate layer - Image - Mirror.
Make it so it's coming out from under the frame.
Add a dropshadow, same as before.
Line Style: diamond Width: 2.00 Color: #482574
Background & Fill Properties: transparent
Draw a dotted rectangle in front of the frame layer.
Objects - Align - Center in Canvas
6.
Add your accents (provided in the zip 'Supplies')
Add your text to the bottom of the tag, using Impact font, Size 72
Add the word 'Certified' to the purple rectangle, using Bank Gothic font, Size 28
Add some sparkles of choice.
Add your mask, copyright/credits and name.
Written May 12, 2022.
I made my set into a full forum set!

Wednesday, 5 January 2022
ROCKATTUDE
♥

SUPPLIES NEEDED
Artwork of ©Elias Chatzoudis - from MyPSPTubes - no longer open
Elias' artwork is now currently being sold at CDO - HERE
Artwork of ©Elias Chatzoudis - from MyPSPTubes - no longer open
Elias' artwork is now currently being sold at CDO - HERE
Scrap Kit: Reineke Designs - called 'Rock Guitar' - no longer available, I can't find it.
(Was at SNCO though.) - but any kit will do if you don't have it!
Template: 'Rockattude' - provided in my supplies - from my old blog Eye Candii
Masks: Tonya's Misfits Choice Mask HERE on CM blog
and my Mask 02 from my blog Sylly Creationz HERE
Screws: Dozibaer - HERE (bottom one)
Plugins:
Penta.com - Jeans
Mura's Meister - Copies
Fonts:
Peignot - HERE
Fixed_01 (pixel) - HERE
Jahannam Balla (for the name) - HERE
My Supplies - DOWNLOAD HERE
♥
~~~~~~~~~~~~~~~~~~~~~~~~~~~~~~
A Pre-Tutorial Note:
In this tutorial, I used an oldie but a goldie from Elias Chatzoudis.
This is also an old template of mine, back when my blog was Eye Candii..
We're talking years ago now, so apologize for the state of my template.
Nothing merged and a kajillion layers.
So, my suggestion is, click on what you want to work with using your cursor, and then work with it, rather than searching for names of layers.
So that is how we will roll with this tutorial, rather than naming the layers, I'll tell you what I'm doing. MUCH easier, lol.
1.
Open up the template, and Shift + D, close the original.
Now open your tube of choice, so you can match colors a bit easier.
I started by adding papers, gradients and changing the colors of the template layers to match my tag.
So, to start, click on all of the dotted circle layers, change the color to suit your tag.
Then click on the glitter layers in the tags and change the color to match your tag.
This will be a huge job done..
You can add gradients in place of the noisy glitter layers too, if you choose.
Too change the color of any of the layers ,
Too change the color of any of the layers ,
go to Adjust - Hue & Saturation - Colorize - I used H: 216 H: 92
If you are going to add a gradient, or paper in any of the layers, do so by this method..
Selections - Select All
Selections - Float
Selections - Defloat
Add a new layer, and then paste your paper or add your gradient.
I always hide or delete the original layer
(if you think you might change something, just hide it.. better to use the original layer)
Add your noise, or use a plugin, and then add a drop shadow of choice.
2.
So now you should have all of your colors changed, papers added, etc.
Let's add the gradient now to the circle layers, if you haven't already done that.
Click the layer to make it active, use the selections method used above, and add your gradient of choice.
The white circle layers above your gradient layers, I changed them to purple by the same selections method above.
Hide the original layer, and then I used the Penta.Com - Jeans plugin to them.
Default settings.
Add a drop shadow of choice.
3.
At this point, I deleted all my hidden layers I don't need anymore.
Then I hid all of my active layers, except the two gradient layers.
Make sure one of the gradient layers are active.
Layers - Merge - Merge Visible.
3.
At this point, I deleted all my hidden layers I don't need anymore.
Then I hid all of my active layers, except the two gradient layers.
Make sure one of the gradient layers are active.
Layers - Merge - Merge Visible.
Unhide all of your layers again.
Make sure the newly merged gradient layer is active.
We are now going to use our tube, or a piece of the tube to fill our gradients.
Paste it onto your canvas so it is right above the merged gradient layer.
I used the bottom half of my tube, by cutting off the legs from the tube.
But you can use a full tube if you wish, to may want to resize it if your tube is large.
Once pasted onto your canvas, go to Mura's Meister - Copies
Then choose Wallpaper (rotate) in the dropdown menu.
Change the Number by sliding the button over until it looks like the screen is full of your tube,
with not much openings in between.
It will be different for everyone depending on the tube and how much of that tube you choose to use.
Hit the 'Ok'.
Your canvas should be full of that tube, and that is all you can see..
Lower this layer to just above the gradient layers you did, if it isn't already there.
Click on your merged gradient layer now.
Selections - Select None
Selections - Float
Selections - Defloat
Selections - Invert
Click on the wallpaper layer, and hit the delete button.
Selections - None.
Duplicate your wallpaper layer now.
Change the blend mode of the bottom one to Luminance (legacy)
And change the blend mode of the top layer to Screen.
Add a drop shadow to the gradient layer.
4.
This is where we start to pretty it up some more.
Choose some elements from the kit you are using.
From the kit I am using, these are the elements I chose. Check tag for placement if using the same one.
Elements 2, 7, 15, 17, 22, 30, 32, 33, 36, 38, 45, and 46.
Add a drop shadow of choice to each..
Now in the tutorial supplies, and the accents provided you can add to the tag,
again looking at my tag for placement.
I used only one of the Rockattudes from the wordart on the template, and moved it to one of the sides.
Add a drop shadow and then duplicate it.
I used only one of the Rockattudes from the wordart on the template, and moved it to one of the sides.
Add a drop shadow and then duplicate it.
Image - Mirror.
Move it to where you want it on the other side.
Using your pixel font, add the words 'rockattude' to the top of the black rectangles.
Using the font Peignot - type the word 'Rockattude' to the small rectangle.
Add the screws by Dozi to each side of that rectangle.
5.
Add your masks, name and watermark to the tag and call it finished!
Thank you so much for trying my tutorial.
♥
©sylvie's tutorials
Written January 5, 2022.


Wednesday, 29 April 2020

Materials Needed:
My frame #02 - download it on my blog sylly creationz - HERE
Tube of choice - I used Elias Chatzoudis (from MPT) but now available at CDO - HERE
(Elias updated the color of the tube when he went independent, after MPT)
Gradient of choice - I used one by Danni made exclusive for Misfits 10th birthday (not provided); but any will do!
Plugins: penta.com - Jeans
Fonts: Fixed_01 (pixel), MF I Love Glitter (name) & Czesko (naughty or nice?)
Texture: included in supplies by KiwiSuz (thank you so much Suz for permission to use)
Tutorial Supplies - HERE
(my frame, my simple slat template, screws, suz-bcatexture12019, accents)
1.
Open up my frame. Keep it the size it is.
Image - Canvas Size - 750 x 750.
Open up Suz's texture from the supplies and paste it behind the frame.
Trim the excess so you only see it behind the frame.
Adjust - Hue & Saturation - Colorize - Hue: 222, Saturation: 219
Now, paste your tube of choice over top of the frame.
Add a dropshadow to it.
Vertical: 0, Horizontal: 0, Opacity: 30, Blur: 3.00, Color: Black
Grab the screws from the supplies and paste it over top of the frame.

2.
Now, using your tube, paste it to the left and to the right over top of the texture.
Hide all layers except the 2 tubes for under the frame, and merge visible.
Unhide all layers, and click on the texture layer to make it active.
Selections: Select All, Selections: Float, Selections: Defloat, Selections: Invert
Click on the newly merged layer to make it active, and hit the delete key on your keyboard.
Selections - None.
Duplicate the merged layer.
In your layer palette, change the blend mode on the bottom layer to Luminance: Legacy
And then, change the blend mode to the top one to Screen.
Hide all layers, except the merged layer, the duplicated merged layer and your texture.
Merge Visible, and then duplicate this merged layer.
On the top one (duplicated one) go to Effects - Plugins - penta.com - Jeans
Use the default settings.
Lower the opacity to this layer to 42.
Hide your main tube layer, and merge all other layers together.
Move the frame and tube down some on your canvas to make more room at the top.
3.
Open up my simple slab template in supplies.
Paste it to the canvas and lower it beneath the merged frame layer.
Make sure it is not showing at the bottom of your frame.

Selections: Select All, Selections: Float, Selections: Defloat
Add a new raster layer and floodfill it with your gradient of choice.
Select None.
Now, paste your tube on each of the slabs, removing the extra bits as you go.
Use the same selection method above to do this.

Hide all layers, except your tubes and gradients over top of your slabs, merge visible.
Duplicate the layer you just merged and change the blend modes.
Bottom to Luminance Legacy, Top to Overlay.
Merge these layers together again, and go to Effects - Plugins - Jeans - same settings.
Click on the original slab template layer that is hidden to make it active.
Selections: Select All, Selections: Float, Selections: Defloat, Selections: Expand by 3
Add a new raster layer
Floodfill it with your gradient of choice, or a different one altogether. Up to you.
Lower this layer beneath the slab/tube layer.
Add a dropshadow, same as above .
THIS is what you should have now..

4.
Open SC_simpletemplate02 from the supplies.
Now, just to be sure of the placement, I copied and pasted the slab layer over to the simple template.
You don't have to, but just easier to figure out tube placement.
Paste your tube over top of the pink rectangle layer 3x, use my tag as a guide.
You want to see the tube between each of the slabs.
Once your tubes are where you want them, make the pink rectangle layer active.
Selections: Select All, Selections: Float, Selections: Defloat, Selections: Invert
Now click on each tube layer and hit the delete key on the keyboard.
Selections: None.
Use your freehand selection tool to delete any excess of the tube , if necessary.
Now click on the long black bottom rectangle and go to
Effects - Plugins - penta.com - Color Dot - use the default settings
Add a dropshadow to all layers, same as above.
Hide the slab layer, and copy merged onto the main tag canvas.
Your tag should now look like this..

5.
Now, open the devils tails and pitchforks accents, and colorize.
Adjust - Hue & Saturation - Colorize - same color as before.
Paste the tail under your tube, and the pitchfork to the right. I resized the fork by 60%.
Paste the halo top, center.
We are all angelic, after all, so the halo is the star of the show, no? LOL
Now paste the lips, starblastaccents (bottom right one), fire (2) and handcuffs.
Open up the accents_layered132 and use the bottom left one.
I pasted it all around from beneath the tag in various places. (2 top, 2 bottom, 2 sides).
Check my tag for my placement of all of these things.
Using the preset shape tool, draw two hearts at the bottom on each side.
I used pink, and i used the raster deform tool to rotate them a bit.
6.
With the Czezko font, and using 2 different colors from your tag,
type out the words 'Naughty or Nice?' right above the frame.
Add a white border around it, or gradient glow.
Dropshadow, same as above.
Using Fixed_01 font, size 6, anti-alias: off, type naughty or nice across the top of the frame.
Now add your masks, I used 2 different ones, one in each color of the tag.
Then, lower it to the lowest layer so it comes out from behind the tag.
Add your copyright, and your name!
We are all finished!
Thank you sooooo much for trying out my tutorial.
♥♥♥
©sylvie's tutorials.
Written April 29, 2020.
Thursday, 5 December 2019
Materials Needed
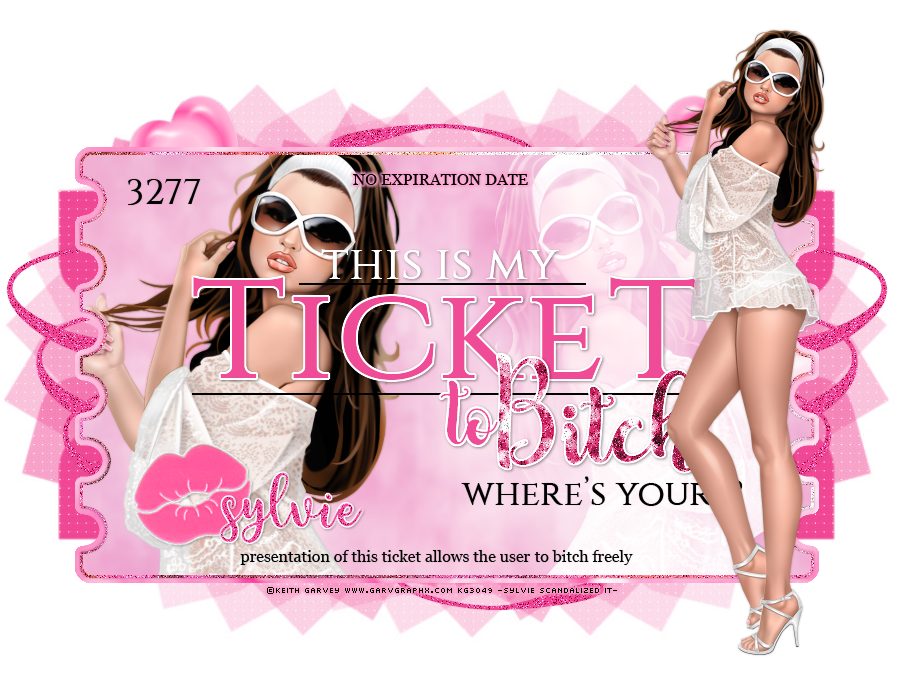
Tube of choice - Keith Garvey 281-1 now available at CDO HERE
Ticket Template - by Chasing After Creativity HERE
Texture 1 - Think Pink Bokeh Texture 9 by Jenna-Rose HERE
Texture 2 - Silver Bokeh Texture II by beckas HERE
Texture 3 - (provided in supplies with permission) - Suz_bcatexturea2
Mask used: Vixmask229 HERE
Font used for Name: Minnie script font (pay) HERE
Gradient of choice - I used TBT_CMBCA19_12 by Tonya's Temptations, exclusive for Misfits
Supplies to download: glittter tile, pink squiggles, heart lollipops, lips & Suz's texture
- DOWNLOAD HERE -
~~~~~~~~~~~~~~~~~~~~~~~~~~~~~~
Okay, let's get started!
1.
Open up your template, press Shift Key and "D" to duplicate it. Close the original.
First, I edited the 'presentation of this ticket' text layer and removed the 'e' from the word 'user'.
Then I cut the end of the text off and smooshed it back together, and merged them.
Now, open up your tube now and place it over the 'ticket' layer to the left of the template.
Make your template layer active.
Selections - All, Selections - Float - Selections - Defloat.
Selections - Invert.
Click on your tube layer now and hit the delete key.
Duplicate your tube. Image - Mirror. Add a dropshadow to the left side tube, 0, 0, 30, 3.00.
I am not merging the tubes together, as I'll be using them differently.
2.
Make your 'ticket back' layer active now.
Open up your paper/pattern of choice and paste it over top of this layer (or choose color).
I used texture 1 above as a paper which I do often, the think pink texture listed above.
Selections - All, Selections - Float, Selections - Defloat, Selections - Invert
Make your texture/paper layer active and hit the delete key to delete excess.
Selections - None. Now add a dropshadow of 0, 0, 30, 3.00.
Adjust - Add/Remove Noise - Add Noise - Random: checked - 33%
Paste your paper/pattern of choice (I used texture 2) over top of the 'ticket' layer.
Now, make your 'ticket' layer active by clicking on it.
Again, Selections - All, Selections - Float, Selections - Defloat, Selections - Invert
Click on texture 2 layer and hit the delete key.
Adjust - Hue & Saturation - Colorize - Hue: 234 - Saturation: 239.
Add the same dropshadow again. Add noise, I used Random and 33% again.
3.
Next, click on your 'ticket' layer and make it active.
Choose your gradient of choice.
I used an exclusive to Misfits gradient, but any pink gradient will do.
Selections - All, Selections - Float, Selections - Defloat, add a new raster layer.
Floodfill your new layer with your gradient of choice now.
Selections, None.
Now, add your texture 3 (by Suz) over top of the gradient layer.
Selections - All, Selections - Float, Selections - Defloat, Selections - Invert
Click on the texture once again and hit the delete key - removing all excess.
Lower the opacity to 82.
Now click on one of your tube layers, I chose the tube to the right.
Change the blend mode to 'Screen'.
4.
Click on the left side tube layer now. Duplicate it and click on the bottom layer.
Adjust - Blur - Gaussian Blur - 1.00.
Now click on the top left tube layer and lower the opacity to 90.
Duplicate that layer now, and go to Effects - Plugins - xero - Radiance
Lower 'Strangeness' to 27, and leave the others as is. Click Ok.
Now lower the opacity of that layer to 30.
Now , click on the 'ticket' layer once again.
Selections - All, Selections - Float, Selections - Defloat, Selections - Invert
Click on the 3 tube layers one at a time and hit the delete key, to delete excess.
Selections - None.
(If you aren't creativity lazy like me, LOL, you can merge the 3 tube layers and then delete).
5.
Click on the 'presentation of this ticket' text layer, add a dropshadow of 0, 0, 20, 2.00.
Click on the '3277' layer and add the same dropshadow.
Click on the 'No Expiration' layer.
Effects - Plugins - Eye Candy 4000 - Gradient Glow - Glow Width 3.00
Click on the 'color tab' in the plugin box and select 'Medium' and change the color box below to any shade of pink that works for you. I used #fca0cd.
6.
Now click on the 'TickeT' text layer.
Selections - All, Selections - Float, Selections - Defloat, and add a new raster layer.
Click that layer to make it active and floodfill it with your color of choice. I used #f04b96.
Do not deselect it yet, go to Selections - Modify - Expand by 2.
Again, add a new raster layer and lower it beneath your pink text layer.
Floodfill it with white. Selections - None. Add a dropshadow of 1, 1, 40, 4.00.
Now do the same with the 'to' text layer. Same dropshadow.
Open the glitter tile and add it to your Material Palette.
Floodfill the word 'Bitch' with that tile - then like the other words , expand by 2.
Floodfill with white on a new raster layer and add the same dropshadow.
Add noise again, same settings as before.
7.
Click on the 'This is my' text layer.
Selections - All, Selections - Float, Selections - Defloat, and add a new raster layer.
Click on the new raster layer now and floodfill with the color white. Add same dropshadow.
Hide or delete the 'This is My' original template layer.
Now, click on 'where's yours' layer - add a dropshadow of 0, 0, 20, 2.00.
8.
Paste the full size version of your tube now, to the right of your ticket.
You may need to enlarge your canvas. Image - Canvas Size - 800x800, if so.
Add your lips. I added a white border around the lips and a dropshadow of 1, 1, 30, 3.00.
Add your pinksquiggle on each side of the ticket.
Add the heart suckers at the top. Right click the layer - Arrange - Send to Bottom.
Image - Mirror and add dropshadow to each, same as before.
Add sparkles, your mask of choice, your copyright and finally a name to finish it up!
WE ARE FINISHED!
Woohoooo, thank you for following my tutorial.
I made mine into a full set.


©sylvie's tutorials.
Written December 5, 2019.
Wednesday, 4 December 2019
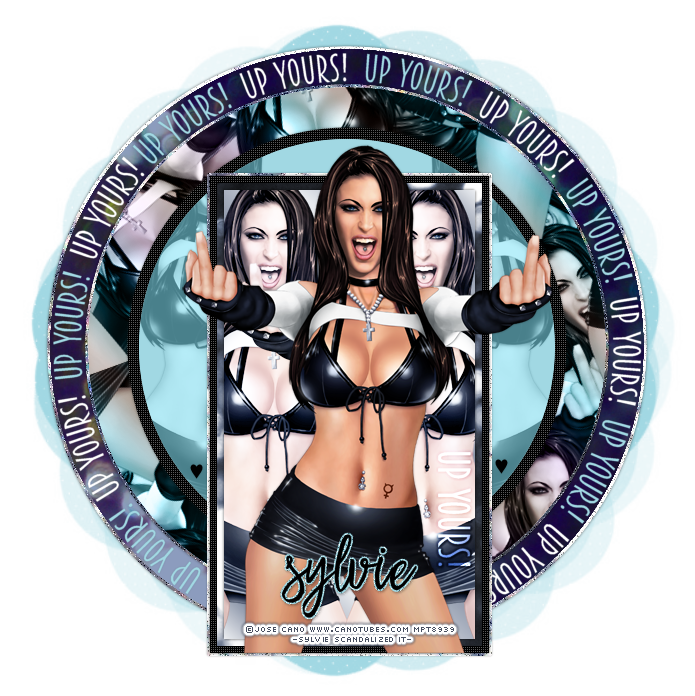
UP YOURS!
Materials Needed:
Tube - I used José Cano purchased at MPT
You can purchase this tube HERE now at Canotubes.com
Preset Shapes - I used rectangle & circle (comes with PSP)
Texture 1: Shimmer Bokeh1 HERE
Texture 2: Bokeh (Pollywaffle) 14 HERE
Font: Breamcatcher HERE
Font for name: My Dear Santa
Plugins: penta.com - color dot, mura's meister - copies
Mask: Vix_mask232 HERE
Resemblance to any other tag or tutorial is purely coincidental.
My tutorials come from my lil' 'ol tired but creative brain, lol.
1.
New Image - 700x700 transparent canvas.
Copy and paste your tube of choice onto your canvas.
2.
Let's start by activating your circle preset shape tool.
Create on vector: checked, H - 0, V-0, Width: 0.00 and anti-alias: checked, color: #474f60
Draw out a circle, that takes up a good part of your canvas.
Now, activate your rectangle preset tool, and draw a rectangle around your tube. I used black.
Make sure the top of the rectangle is around her neckline, & bottom where her legs cut off.
Rename your circle, rectangle and tube layer accordingly.
(all pictured in the preview below)

3.
Now, open up texture 1, texture 2 and a gradient of choice.
I made my own gradient using matching colors in my tag, but any will do.
Resize texture 1 by 35%, then paste onto your canvas under your rectangle layer.
Activate your rectangle layer in your layer palette.
Selections - All
Selections - Float
Selections - Defloat
Selections - Modify - Expand by 3
Selections - Invert - and then click on the texture layer and hit delete key on your keyboard.
Selections - None.
Adjust - Add/Remove Noise - Add Noise - Random: checked, 33%, Monochrome: checked.
Add drop shadow of 0, 0, 30, 3.00.
4.
Now, make your rectangle layer active again.
Selections - All, Selections - Float, Selections - Defloat
Selections - Modify - Contract by 6
Resize texture 2 (same %) and paste it over top of the rectangle layer & move it so it covers it.
Selections - Invert.
Hit the delete key, and do not deselect it yet.
Now, go to Selections - Modify - Contract by 6 again.
Add a new raster layer just above the texture 2 layer, and floodfill it with your gradient.
Selections - None.
5.
Duplicate your tube layer, and drop it down just above your gradient layer.
Duplicate it then Image - Mirror. You should have a tube on either side of the main tube now.
Hide all layers except the 2 tubes just above the gradient. Merge Visible.
Unhide all other layers again.
Activate your gradient layer, Selections - All, Selections - Float, Selections - Defloat.
Click on your double tube layer again.
Selections - Invert and hit delete on the keyboard.
Now, duplicate your double tube layer.
Bottom double tube layer, change the blend mode to Luminance (Legacy).
The top double tube layer, change the blend mode to Screen.
Activate the gradient rectangle, add dropshadow 1, 1, 40, 4.00, and then -1, -1, 40, 4.00.
Now, activate your texture 2 layer and add a dropshadow of 0, 0, 30, 3.00.
Adjust - Hue & Saturation - Colorize: Hue: 156 & Saturation: 38.
Lastly, go to the black rectangle layer.
Effects - Penta.com - Color dot - original settings. Add dropshadow 0, 0, 30, 3.00.
6.
Now, open your Breamcatcher font.
Color: White, Size 30 - Type the words Up Yours! and convert to a raster layer.
Image - rotate by 90% to the right and place it just over top of your double tube layers.
Change your blend mode to overlay, and then duplicate the layer so it shows up more.

7.
Now, some repetitive stuff for the circle layer, so I'll keep this simple.
Just follow the steps above if you don't remember them accurately.
Use texture 1 for the edge of the circle, once again expanding by 3.
The only difference is that I resized the texture by 40% this time instead of 35%.
But if your circle is smaller than mine you won't need to.
Add the same noise and dropshadow 0, 0, 40, 4.00.
8.
Now, activate your blue circle layer.
Selections - All, Selections - Float, Selections - Defloat, Selections - Modify - Contract by 35.
Add new raster layer and paste your texture 1 again over top of your circle layer.
Selections - Invert and hit the delete key. Do not deselect.
Selections - Modify - Contract by 3. Add a new raster layer and floodfill with your gradient.
Selections - None.
Activate your texture one layer and add noise (same) & drop shadow 0, 0, 40, 4.00 again.
Duplicate your single tube, and move it just above your gradient texture.
Go to Mura's Meister, Copies, Wallpaper (rotate), and change number to 54.
Now you'll see your tubes wallpapered across your canvas, don't panic!
Go to your gradient layer right below the wallpapered layer.
Selections - All, Selections - Float, Selections - Defloat, Selections - Invert
And hit delete on your wallpaper layer.
Duplicate your wallpapered tubes layer.
The bottom one, change your blend mode to Luminance (legacy).
The top, change it to Overlay and lower the opacity to 22.
9.
Using your circle preset shape again, draw a smaller circle, place it over wallpapered tubes.
Add a drop shadow of 0, 0, 40, 4.00. I chose black for my circle. Add penta - color dot again.
Now draw another circle a bit smaller over that one, I used #a1d8e3 for the color.
I then pasted a tube to each side again, merged them, inverted and deleted the excess.
Change the blend mode to Luminance (Legacy) and lower the opacity to 44.
Paste your texture 2 over top of the blue circle layer, cut the excess like previous times.
Change the blend mode to opacity, and then activate the blue circle; add dropshadow.
10.
Last finishing touches to the tag now.
Add the circular text 'Up Yours' using Breamcatcher font again, colors: white & light blue.
Lower it to the layer just above the dark blue circle layer and texture 2.
If you don't know how to do circle text, I have a tutorial for that, click HERE.
Add your mask of choice, your copyright and your name.
Woohoooooo, we're all finished!
I made mine into a full 3 piece set.
Here are the other 2 pieces!


©sylvie's tutorials
Written December 4, 2019.
Materials Needed:
Tube - I used José Cano purchased at MPT
You can purchase this tube HERE now at Canotubes.com
Preset Shapes - I used rectangle & circle (comes with PSP)
Texture 1: Shimmer Bokeh1 HERE
Texture 2: Bokeh (Pollywaffle) 14 HERE
Font: Breamcatcher HERE
Font for name: My Dear Santa
Plugins: penta.com - color dot, mura's meister - copies
Mask: Vix_mask232 HERE
Resemblance to any other tag or tutorial is purely coincidental.
My tutorials come from my lil' 'ol tired but creative brain, lol.
1.
New Image - 700x700 transparent canvas.
Copy and paste your tube of choice onto your canvas.
2.
Let's start by activating your circle preset shape tool.
Create on vector: checked, H - 0, V-0, Width: 0.00 and anti-alias: checked, color: #474f60
Draw out a circle, that takes up a good part of your canvas.
Now, activate your rectangle preset tool, and draw a rectangle around your tube. I used black.
Make sure the top of the rectangle is around her neckline, & bottom where her legs cut off.
Rename your circle, rectangle and tube layer accordingly.
(all pictured in the preview below)
3.
Now, open up texture 1, texture 2 and a gradient of choice.
I made my own gradient using matching colors in my tag, but any will do.
Resize texture 1 by 35%, then paste onto your canvas under your rectangle layer.
Activate your rectangle layer in your layer palette.
Selections - All
Selections - Float
Selections - Defloat
Selections - Modify - Expand by 3
Selections - Invert - and then click on the texture layer and hit delete key on your keyboard.
Selections - None.
Adjust - Add/Remove Noise - Add Noise - Random: checked, 33%, Monochrome: checked.
Add drop shadow of 0, 0, 30, 3.00.
4.
Now, make your rectangle layer active again.
Selections - All, Selections - Float, Selections - Defloat
Selections - Modify - Contract by 6
Resize texture 2 (same %) and paste it over top of the rectangle layer & move it so it covers it.
Selections - Invert.
Hit the delete key, and do not deselect it yet.
Now, go to Selections - Modify - Contract by 6 again.
Add a new raster layer just above the texture 2 layer, and floodfill it with your gradient.
Selections - None.
5.
Duplicate your tube layer, and drop it down just above your gradient layer.
Duplicate it then Image - Mirror. You should have a tube on either side of the main tube now.
Hide all layers except the 2 tubes just above the gradient. Merge Visible.
Unhide all other layers again.
Activate your gradient layer, Selections - All, Selections - Float, Selections - Defloat.
Click on your double tube layer again.
Selections - Invert and hit delete on the keyboard.
Now, duplicate your double tube layer.
Bottom double tube layer, change the blend mode to Luminance (Legacy).
The top double tube layer, change the blend mode to Screen.
Activate the gradient rectangle, add dropshadow 1, 1, 40, 4.00, and then -1, -1, 40, 4.00.
Now, activate your texture 2 layer and add a dropshadow of 0, 0, 30, 3.00.
Adjust - Hue & Saturation - Colorize: Hue: 156 & Saturation: 38.
Lastly, go to the black rectangle layer.
Effects - Penta.com - Color dot - original settings. Add dropshadow 0, 0, 30, 3.00.
6.
Now, open your Breamcatcher font.
Color: White, Size 30 - Type the words Up Yours! and convert to a raster layer.
Image - rotate by 90% to the right and place it just over top of your double tube layers.
Change your blend mode to overlay, and then duplicate the layer so it shows up more.
7.
Now, some repetitive stuff for the circle layer, so I'll keep this simple.
Just follow the steps above if you don't remember them accurately.
Use texture 1 for the edge of the circle, once again expanding by 3.
The only difference is that I resized the texture by 40% this time instead of 35%.
But if your circle is smaller than mine you won't need to.
Add the same noise and dropshadow 0, 0, 40, 4.00.
8.
Now, activate your blue circle layer.
Selections - All, Selections - Float, Selections - Defloat, Selections - Modify - Contract by 35.
Add new raster layer and paste your texture 1 again over top of your circle layer.
Selections - Invert and hit the delete key. Do not deselect.
Selections - Modify - Contract by 3. Add a new raster layer and floodfill with your gradient.
Selections - None.
Activate your texture one layer and add noise (same) & drop shadow 0, 0, 40, 4.00 again.
Duplicate your single tube, and move it just above your gradient texture.
Go to Mura's Meister, Copies, Wallpaper (rotate), and change number to 54.
Now you'll see your tubes wallpapered across your canvas, don't panic!
Go to your gradient layer right below the wallpapered layer.
Selections - All, Selections - Float, Selections - Defloat, Selections - Invert
And hit delete on your wallpaper layer.
Duplicate your wallpapered tubes layer.
The bottom one, change your blend mode to Luminance (legacy).
The top, change it to Overlay and lower the opacity to 22.
9.
Using your circle preset shape again, draw a smaller circle, place it over wallpapered tubes.
Add a drop shadow of 0, 0, 40, 4.00. I chose black for my circle. Add penta - color dot again.
Now draw another circle a bit smaller over that one, I used #a1d8e3 for the color.
I then pasted a tube to each side again, merged them, inverted and deleted the excess.
Change the blend mode to Luminance (Legacy) and lower the opacity to 44.
Paste your texture 2 over top of the blue circle layer, cut the excess like previous times.
Change the blend mode to opacity, and then activate the blue circle; add dropshadow.
10.
Last finishing touches to the tag now.
Add the circular text 'Up Yours' using Breamcatcher font again, colors: white & light blue.
Lower it to the layer just above the dark blue circle layer and texture 2.
If you don't know how to do circle text, I have a tutorial for that, click HERE.
Add your mask of choice, your copyright and your name.
Woohoooooo, we're all finished!
I made mine into a full 3 piece set.
Here are the other 2 pieces!
©sylvie's tutorials
Written December 4, 2019.
Subscribe to:
Posts
(Atom)


