Saturday, 7 January 2023
10:04 | Edit Post

Tube by ©Amber - by VMArtists - HERE
FTU Scrap Kit by Tamie at Addictive Pleasures - RnB - HERE
Butterline (wordart)
Fixed_01 (pixel font)
Sthephen Bold (for the name)
Wordart
You can make your own using fonts listed above, or use my wordart here
You may use this wordart in other projects other than this tutorial
(just right click and save)
Okay, let's get started!
1.
File - New Image - 750 x 750 - Transparent
Paste 'skyline' to the canvas - resize by 70%
Now paste 'filmslide' to your canvas and move to the right and down some.
Using your Magic Wand Tool, click in to each small hole of the slide while holding down the shift key
Add a new raster layer
Selections - Modify - Expand by 3
Floodfill each hole with color of choice, I used black
Selections - None
Adjust - Add/Remove Noise - Add Noise
Random - 25% - Monochrome: Checked
(or use a gradient or paper of choice, up to you!)
I used #8a709d and #e8ca5b
Using your magic wand tool again, click inside the frame
Add a new raster layer and floodfill with your new gradient
Selections - None
Now click on your frame layer and add a dropshadow of choice.
I used 0, 0, 40, 4.00.
2.
Paste your tube to the canvas, I moved mine to the left of the frame
Add a dropshadow, same as above.
Now, I cut a piece of the tube, and pasted it over the gradient layer.
Image - Mirror
Click on your gradient layer
Selections - Float
Selections - Defloat
Selections - Invert
Now click on your tube layer and hit the delete key to trim excess
Selections - None
Duplicate the tube
Change the blend mode of the bottom one to Luminance (Legacy)
And the blend mode of the top one to Overlay
3.
Add a dropshadow to each if you like
Boombox - resize by 50%
Label 2 - resize by 60%
Open paper 12 and add it to your material palette
Using the preset shape tool, rectangle
Horizontal and Vertical Radius set to 20.00
(will create rounded corners on your rectangle)
Now draw two rectangles for each side of the tag
One from the top right area to fill that in, and one bottom left.
Add a dropshadow to them, same as before.
Now do the same with paper 10.
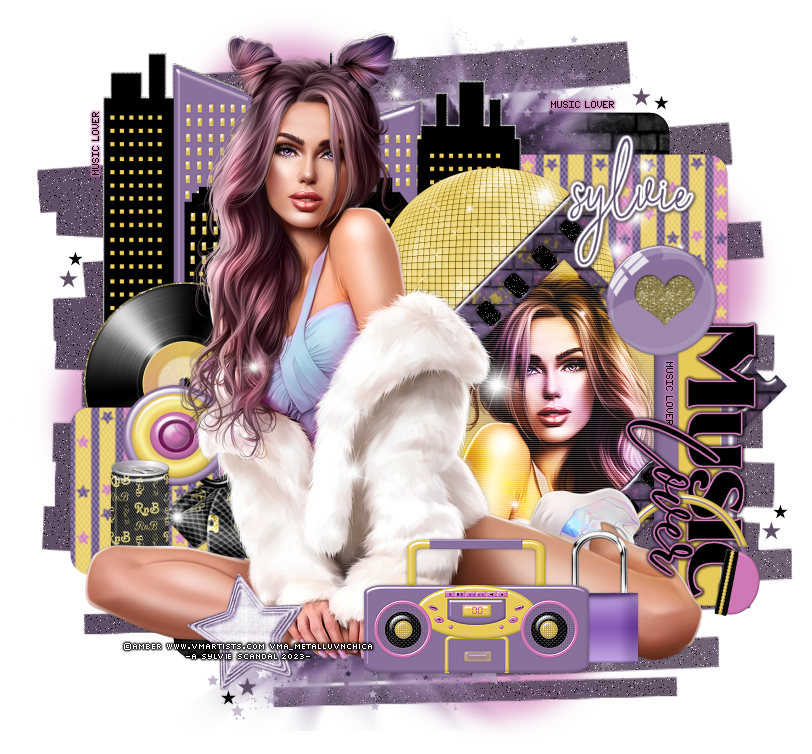
Here is a shot of what I have so far, so you can see my placement:
Once again, see my tag for placement of these
And add a dropshadow if you wish to each
Decor 3 - resize by 60%
I pasted this over top of the brick rectangle layers on each side of the tag
Record - resize by 50%
Star3 - resize by 40%
5.
Using the font 2 Deco Roman DNA, type the word music in black
Image - Rotate - Free Rotate by 90% to the right
Move it over the label on the tag
Add a border or glow, however you wish
I have included mine in supplies if you'd rather use that!
Also, I used Butterline for the word Lover.
Now use the pixel font and type out Music Lover in a couple of places.
Using preset shape tool, make some small stars around the tag in various places
Add sparkles of choice
Lastly, using your preset shape tool, set to circle
Color: #ce77b3
Adjust - Blur - Gaussian Blur - 15.00
Add your copyright, and tag is finished!
Thank you so much for following along!
♥
© sylvie's tutorials.
Written January 7, 2023.
Labels:music,music lover,sexy
Subscribe to:
Post Comments
(Atom)
-me-


Hi Sylvie, thanks for a great tut
ReplyDeleteI made a 3 piece set for you, hope you like it
AVA
https://media.fotki.com/2v2eDedhnxwDe7d.png
SIG
https://media.fotki.com/2v2eDedCqxwDe7d.png
TAG
https://media.fotki.com/2v2eDedLFxwDe7d.png
Hugs, Betsy E.