Monday, 15 August 2022
19:10 | Edit Post
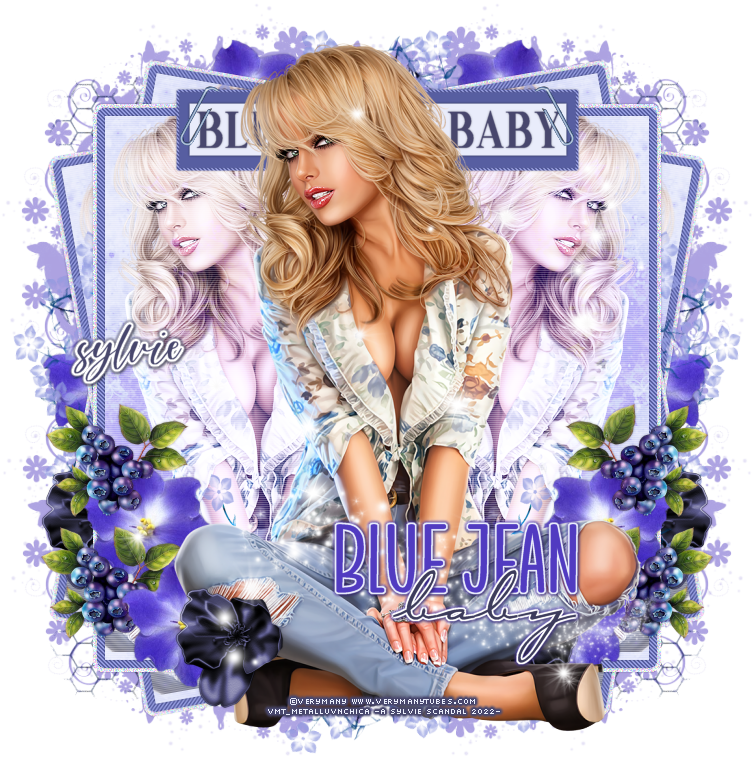
Blue Jean Baby

Supplies Needed
Tube: by Verymany - I used 'Beatrix' - HERE
Scrap Kit: by Mizteeque (FTU) called 'Berry Much' - HERE
Plugins: Penta.com - Jeans, Eye Candy 4000 & Mura's Meister - Copies
Preset Shapes: Rectangle
Mask: Mine, Mask 1 at sylly creationz - HERE
Sparkles of choice
Fonts Used: The Queen-Regular (Blue Jean Baby at top), Miracle Justice (the name)
~~~~~~~~~~~~~~~~~~~~~~~~~~~~~~~~
Okay, let's get started now!
1.
New canvas - 800x800.
Open paper 10 from the scrap kit, and resize it by 68%.
Add a new raster layer.
Flood fill this layer with color #e9ecfb.
Change the blend mode to 'overlay'.
Now, paste your tube of choice on each side of the paper.
Click on the original paper layer.
Selections - Select All
Selections - Float
Selections - Defloat
Selections - Invert
Click on the tube layers and hit the delete key on each one.
Selections - None.
Layers - Merge - Merge Visible.
2.
Now, once again:
Selections - Select All
Selections - Float
Selections - Defloat
Selections - Modify - Expand by 8
Add a new raster layer and floodfill with a color of choice
I used: #575ea1
Lower this layer beneath the merged paper layer.
Selections - Modify - Expand by 3
Add a new raster layer and floodfill with then light blue we used above.
Selections - Select None.
Lower this layer to the very bottom.
On the bottom layer - Add Noise - Uniform - 43%.
Add a drop shadow.
Now click on the middle layer.
Use the plugin - Penta.com - Jeans - original settings.
Add a dropshadow to this layer.
Now add a dropshadow to the top, merged paper layer.
Layers - Merge - Merge Visible.
You should now have something similar to this.
Duplicate this layer.
Image - Rotate - Free Rotate - 10%
Move this layer to the bottom layer.
Duplicate the rotated layer
Image - Mirror
Now, it should look something like this
Wooohooo, okay, let's continue now.
Grab element 15 from the scrap kit.
Resize it by 40%.
Using Mura's Meister - Copies
In the preset menu, choose 'Encircle'
The rest of the settings stay as they are, hit OK.
Lower this layer beneath the main rectangular layer but over top of the two rotated ones.
I made it come out from each side, and then the top and the bottom by duplicating the layer.
Now, open the element again from the kit, and rotate it by 90% to the LEFT
Now, once again use the same settings in Mura's Meister.
Now move this to the bottom and make it come out from beneath the tag on each side, top and bottom.
Now open element 21 from the kit.
Resize by 50% and move that layer to the very bottom.
I duplicated it x3 and moved it to each corner of the tag.
See my tag for reference.
5.
Now I opened the following elements and resized them to my liking to add to the tag.
Element 3 (blueberries)
Element 5 (flower)
Element 11 (flower)
Add dropshadow to each, and again see my tag for placement.
6.
I now pasted the main tube over top of this. Add dropshadow.
Using the preset shape tool again, draw a rectangle at the top of the tag.
I used the color #575ea1.
Selections - Select All
Selections - Float
Selections - Defloat
Selections - Modify - Expand by 3
Add a new raster layer and floodfill it with the same color.
Move this layer below the rectangle you just drew.
Add the penta.com - Jeans plugin, same settings.
Add a dropshadow.
Now add a dropshadow to the first rectangle you drew.
Using the color #e9ecfb draw a smaller rectangle over top of those two.
Add a dropshadow again.
7.
Add your sparkles of choice, if you want some.
Add the wordart I made from my supplies.
Now add the mask and lower it to the bottom layer.
I used color #513bc1 and lowered the opacity to 58%.
Add your 'Blue Jean Baby' across the rectangles at the top.
I used 'The Queen' font - size 42
and then used my Raster Deform tool to size it better in the rectangles.
Add your paper clip from my supplies to each side of the rectangle.
Add your copyright, and name.
And now we are all finished!
Thank you so much for following along with me.
♥♥
© sylvie's tutorials.
Written August 15, 2022.
Labels:blue jean baby,sexy
Subscribe to:
Post Comments
(Atom)
-me-


Hi Sylvie
ReplyDeleteThank you so much for the great and detailed tut
I love it
I made you a 3 piece set
I hope you like it
AVA
https://media.fotki.com/2v2eDedTNxwDe7d.png
SIG
https://media.fotki.com/2v2eDedSrxwDe7d.png
TAG
https://media.fotki.com/2v2eDedVjxwDe7d.png
Hugs, Betsy E.