Sunday, 13 March 2022
07:34 | Edit Post
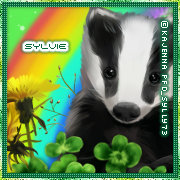
CUTEST CLOVER
Tube - Art by ©Kajenna - Available at PicsForDesign HERE
Scrap Kit by Wicked Diabla - Lucky Clover - Available HERE
Template by Me - Available on Creative Misfits blog HERE
Mask by Me - Mask 046 - Available on Creative Misfits blog HERE
Textures by GrimAna - provided in Creative Misfits forum
You can use any texture or paper in it's place if you don't have them.
Plugins
Xero - Fritillary
Penta.com - Color Dot & Jeans
Eye Candy 4000 - Gradient Glow
Fonts
Fixed_01 (pixel text)
Vanilla Mermaid - name on the tag
~~~~~~~~~~~~~~~~~~~~~~~~~
Okay, let's get started!
1.
Open up the template, delete the watermark.
Shift + D to duplicate it, close out the original.
Open your paper or texture of choice.
I used a texture by Ana, you can use any paper or texture of choice here.
Click on the layer '4 circles - green'.
Add your paper/texture of choice by using the method below.
Selections - Select All
Selections - Float
Selections - Defloat
Add a new raster layer and paste the texture/paper here.
Selections - None.
Hide the original template layer.
Now, using the same method, add a gradient layer.
And then open your tube, and use that same method one more time.
Ensure your tube is the very top layer, then the texture and then the gradient at the bottom.
Change the texture layer blend mode to 'overlay'.
Duplicate the tube layer.
Change the bottom tube layer to 'Luminance Legacy'
Change the top tube layer to 'Soft Light'.
I hid all layers, except the tube, gradient and texture layers..
Make them active and then Layers - Merge - Merge Visible.
Add drop shadow .
Click on layer '4 circles light green'..
I changed the color to a darker green to match the tube.
Effects - penta.com - Color Dot - default settings.
Add a drop shadow.
Unhide your layer '4 circles - gradient'.
Add drop shadow.
Effects - Texture Effects - Blinds
Width: 3 Opacity: 43 Color: White Horizontal: Checked
Now, Merge visible all of these layers.
3.
I grabbed the 2nd texture by Ana - and pasted it over the 'circle green' layer.
Duplicate the paper or texture you use.
On the bottom layer, I chose the blend mode 'Hue'
And the one over top of it, I choose 'Screen'.
Click on the 'circle green' layer again.
Selections - Select All
Selections - Float
Selections - Defloat
Selections - Invert
Click on both of the paper/texture layers again and hit the delete key on both.
Selections - None.
4.
Click on 'text - circular'
If not, change the color and then add a drop shadow.
Duplicate your tube and lower this one just above the large shamrock layer.
Use the selections method above to cut the tube to the shape of the shamrock.
Change the blend mode to 'Overlay'.
Now, click on the 'large shamrock' layer
Selections - Select All
Selections - Float
Selections - Defloat
Selections - Modify - Expand by 2
Add a new raster layer and lower it beneath the large shamrock.
Floodfill with a gradient of choice.
Selections - None.
Add noise, add drop shadow and then add drop shadow to your large shamrock layer too.
5.
Click on the 'yellow back' layer.
Effects - Plugins - Xero - Fritillary
Change the variation to 15, click OK.
Add drop shadow.
Click on the 'green square' layer.
Effects - Plugins - penta.com - Jeans - default settings.
Add drop shadow.
Click on 'dark green back' , add drop shadow.
Click on '4 light shamrocks' layer.
Add Noise to it
Random - 16% - Monochrome: checked
Add drop shadow.
Click on '4 dark shamrocks' and add drop shadow.
6.
I also added some noise to the larger text, same as above.
Using the 'Fixed_01' pixel, I added the words 'clover' to the green circle backs.
Add dropshadow to those circle backs also.
Now, using your kit, add some bits and pieces of your choosing.
You can use my tag for reference, or go on your own.
Add your masks, I used 2 different colors with the same mask 046.
Add your watermark , and the name.
Your tag is now finished!
Thank you for trying my tutorial.
♥
©sylvie's tutorials.
Written March 13th, 2022.
I made a full 3 piece set, so sharing the other 2 parts here.
Labels:cutest clover,cutesy,st patrick's
Subscribe to:
Post Comments
(Atom)
-me-


0 comments:
Post a Comment